Rescuing a ThinkPad T420
A few months ago, I decided to take on the challenge of rescuing an old laptop from 2011. My previous laptop, which was a lot newer than this one, decided that it no longer wanted to live. Since replacing it wasn’t urgent, I decided to look for old but functional laptops that I could tinker with, while I figured out what I’d use for the foreseeable future.
I found an eBay listing that listed a ThinkPad T420 for sale, from a private charter school that upgraded their fleet of laptops. It listed multiple for sale, so I couldn’t get accurate images of the actual laptop, but they did say that it functions and that it included a charger. The specs included an Intel i5-2520M, 4 gigabytes of DDR3, and a 320 gigabyte hard drive. I ended up paying $84 including shipping and fees for this thing.
First Impressions
When my ThinkPad arrived, it was a mess! The lid was scratched all over, the screen had a large crack down the center under a wall of fingerprints, the keyboard had hair and dirt packed inside, and the body was just sticky all over. I couldn’t bring myself to type on it without a deep clean first.
Tissue paper soaking in isopropyl alcohol was my cleaner of choice, which helped me take care of the screen and the body. I got rid of all the stickers in this process, including the Windows stickers and (unfortunately) the inner ThinkPad sticker, as they were already peeling off anyway.
The lid was the hardest to clean. Every scratch I cleaned off seemed to spawn a new one at the slightest touch. It seems that the coating they used on these ThinkPads has aged terribly. I searched for cleaning tips to see how other people have cleaned their ThinkPads, and some people have suggested using a damp Mr. Clean Magic Eraser on the lid. I scrubbed the lid with one and it worked wonders! All but the deepest scratches are gone, and I don’t see fresh marks or residue when I handle it now.
As for the keyboard, I just decided to wipe the surfaces of the keys down with some alcohol. There’s no point in doing a proper cleaning since I will be replacing it anyway.
After giving this T420 a proper bath, I turned it on and saw it boot to the Windows 10 setup screen instead of the current Windows 11, which already makes this thing peak. After playing around with it a bit, I was able to confirm the specs match with the eBay listing, and that it runs as expected.
Upgrade 1: Battery
One problem that I immediately noticed was that the battery does not hold a charge at all. I had to always keep it plugged to the wall, otherwise it would just shut off.
Looking for battery upgrades online, I noticed that I could easily buy an upgraded 9-cell battery for the T420 at just $25. The thing is, these are not OEM batteries and the performance might not be the best. OEM batteries aren’t being produced anymore and the ones that currently exist are over $40, and even those could just end up being knockoffs or too old to hold a proper charge. As such, I have no other choice but to buy the non-OEM 9-cell battery.
I can’t tell how much of an improvement they are compared to the standard 6-cell battery that came with this laptop, but so far it works and I have about 7-10 hours of battery life according to Windows. The battery bulges out the back (to make space for the extra 3 cells), which I actually really like, because it doubles as a grip when I want to use the ThinkPad while standing. I can just rest the ThinkPad one-handed against my forearm like this:
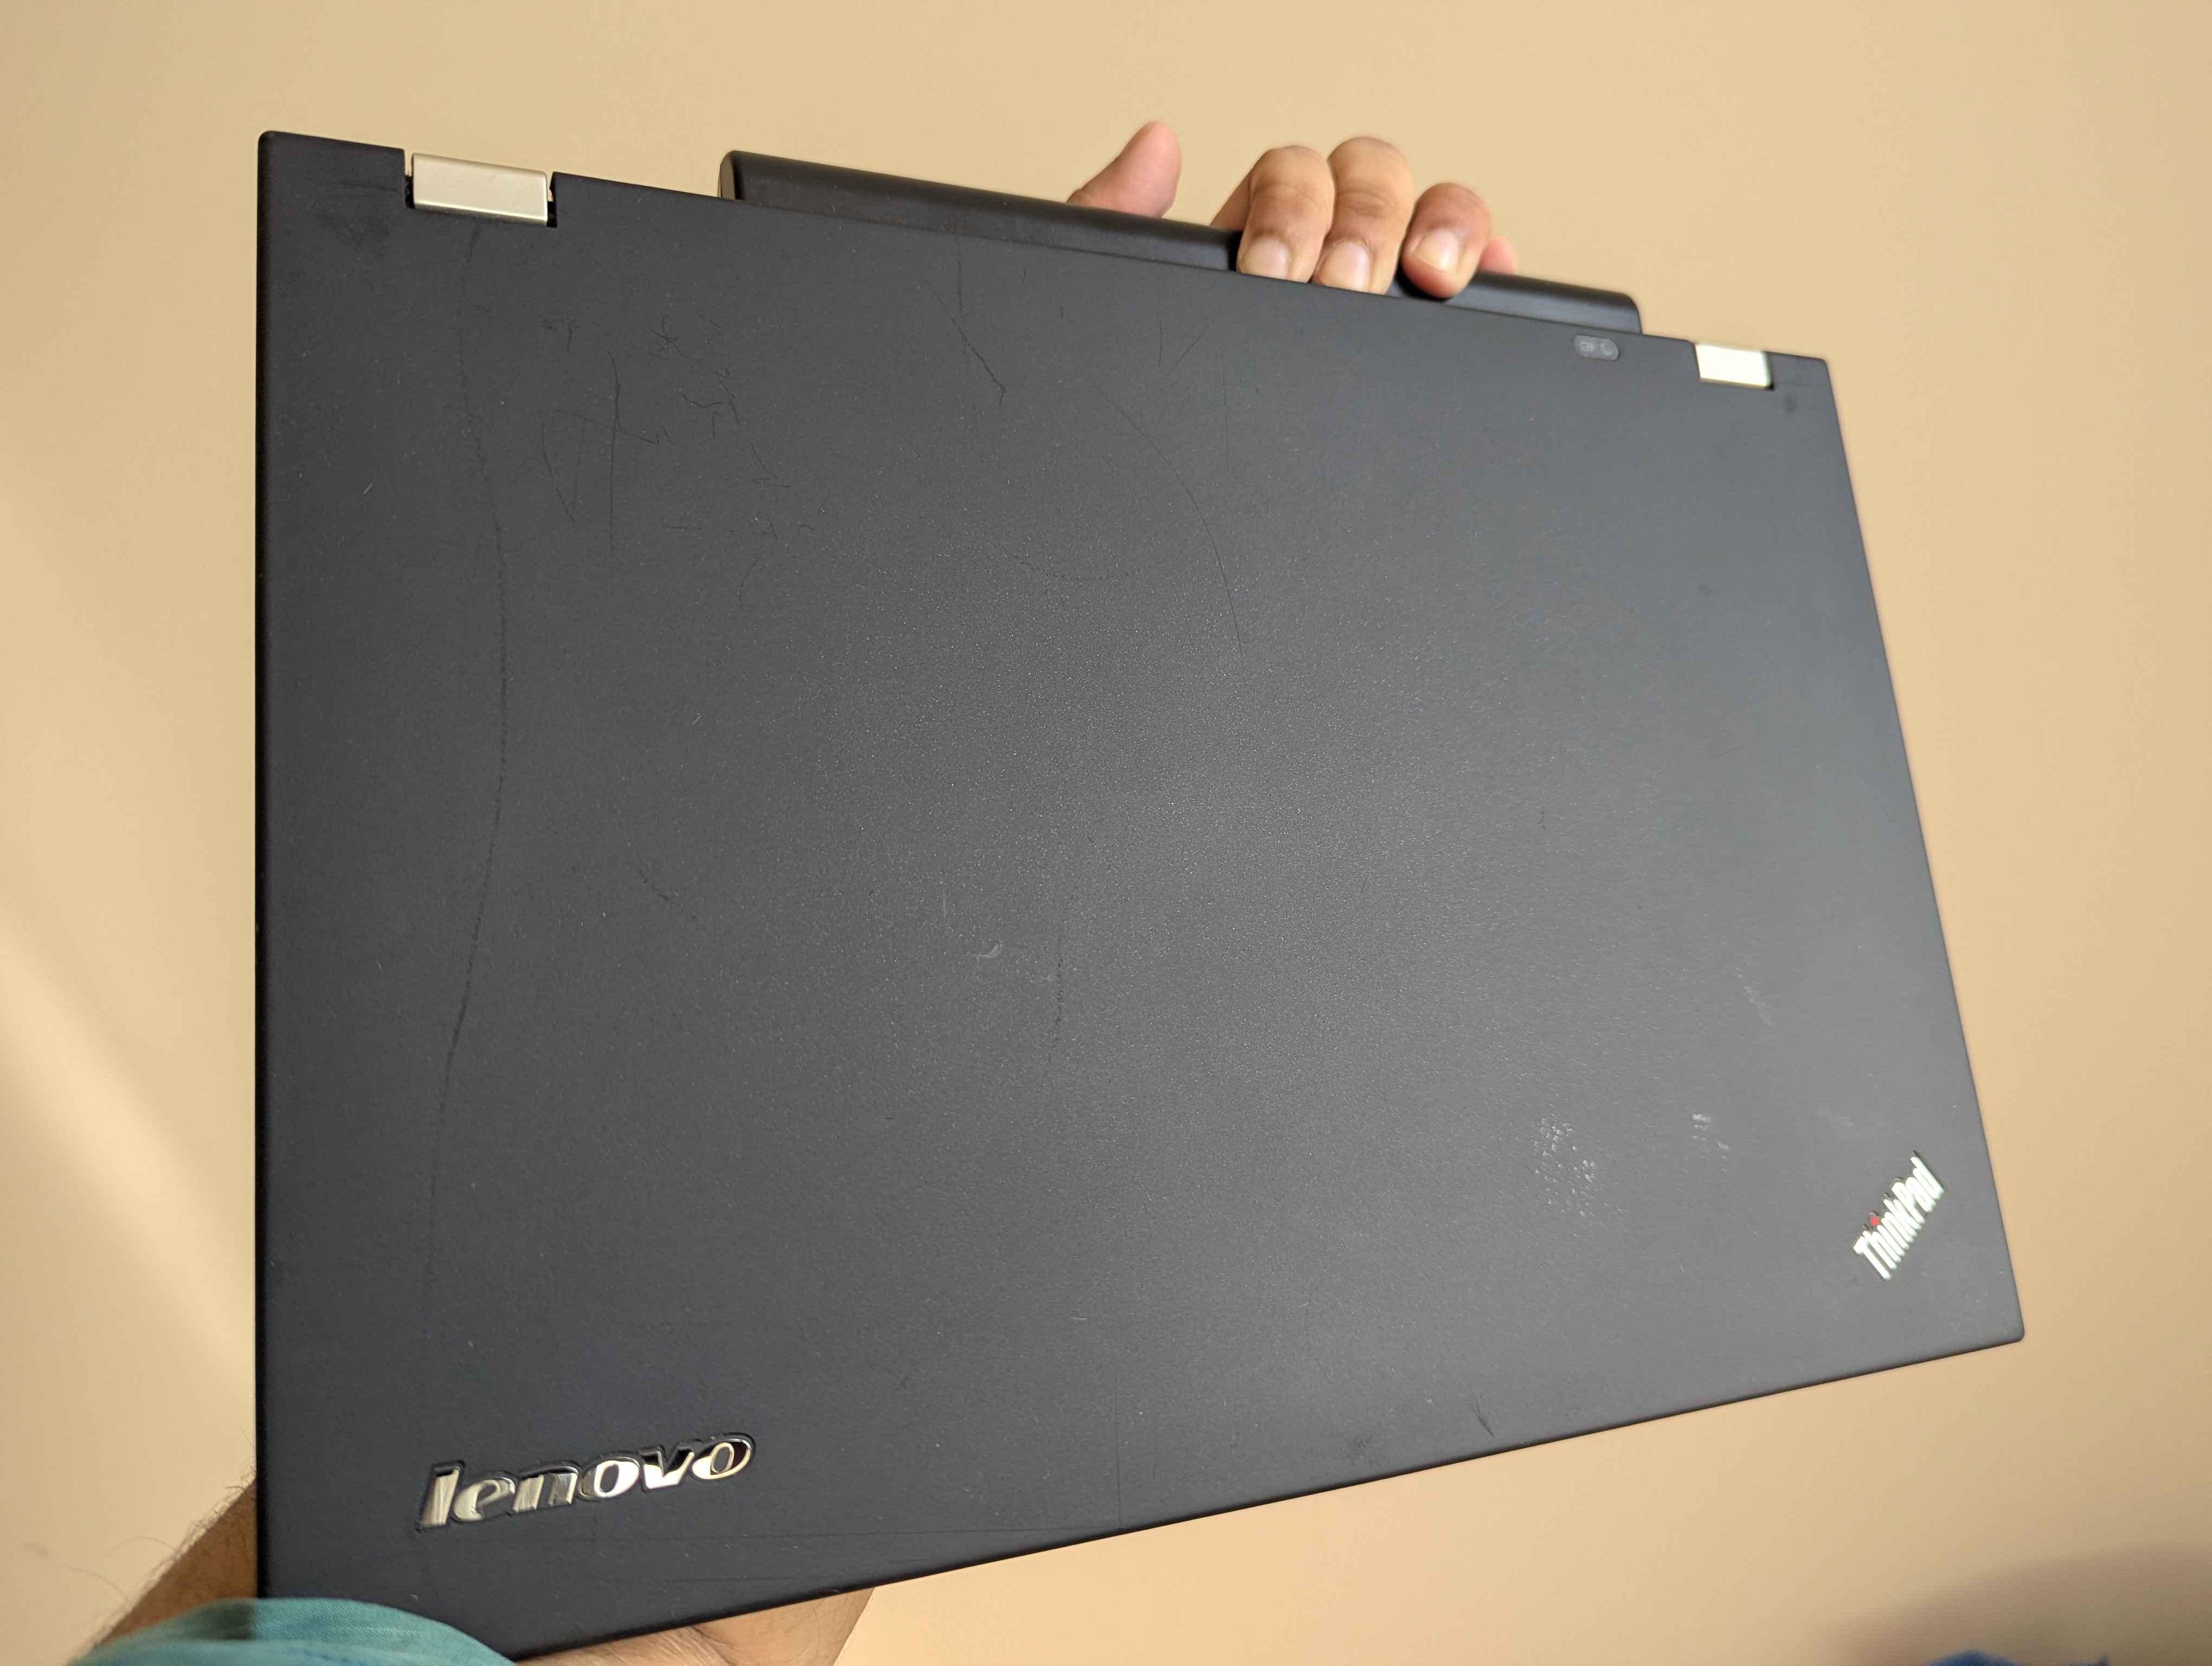
It could also work as a carry handle, though I don’t totally trust the battery’s hinge strength to keep holding onto the ThinkPad for long periods of time.
Upgrade 2: Screen
Ignoring the huge scratch, the screen is just terrible to look at. It’s a TN screen at 1366x768, which means small text is incredibly blurry and colors are inconsistent depending on the angle you’re viewing it from. I really needed to upgrade the screen if I want this machine to feel fresh again.
For the parts, I would need to actually buy two parts. One part is a converter board (aka “IPS FHD Upgrade Kit”) that will convert the ThinkPad’s 30-pin screen connector into the 40-pin connector that the screen will actually use. The second part is the screen itself, which has to be compatible with the converter board. Thankfully, the listing states a bunch of compatible screen models. I chose the AUO B140HAN01.3 since it was the easiest/cheapest to buy. The board cost $46 while the screen cost $63.
For the installation, I needed to disassemble the ThinkPad. The first few steps are actually pretty standard for the rest of the upgrades. I also enabled the option in BIOS to “Power On with AC Attach” so that I don’t need the keyboard attached to turn it on.
- Removed the battery
- Unscrewed all the screws from the bottom
- Removed the SSD cover and CD tray from the side
- Removed the small RAM cover and unscrewed the screw inside it.
- Removed the keyboard by sliding it up, then unplugging the cable
- Unscrewed the 2 screws holding the inner body
- Removed the inner body, then unplugging the touchpad cable
- Removed the CPU heatsink
- Gently peeled off the screen cover
- Unscrewed and unplugged the screen
Now with the install, I had to tape the converter board to the lid, so that it would sit behind the screen itself. Putting the correct cables in place was easy, though I was a bit concerned with the cables or the board causing the screen to bend or snap. Installing the screen itself felt a bit tight, especially with the stuff behind it. Once it was done, I tested if it displayed correctly by plugging it in, and it sure does work!
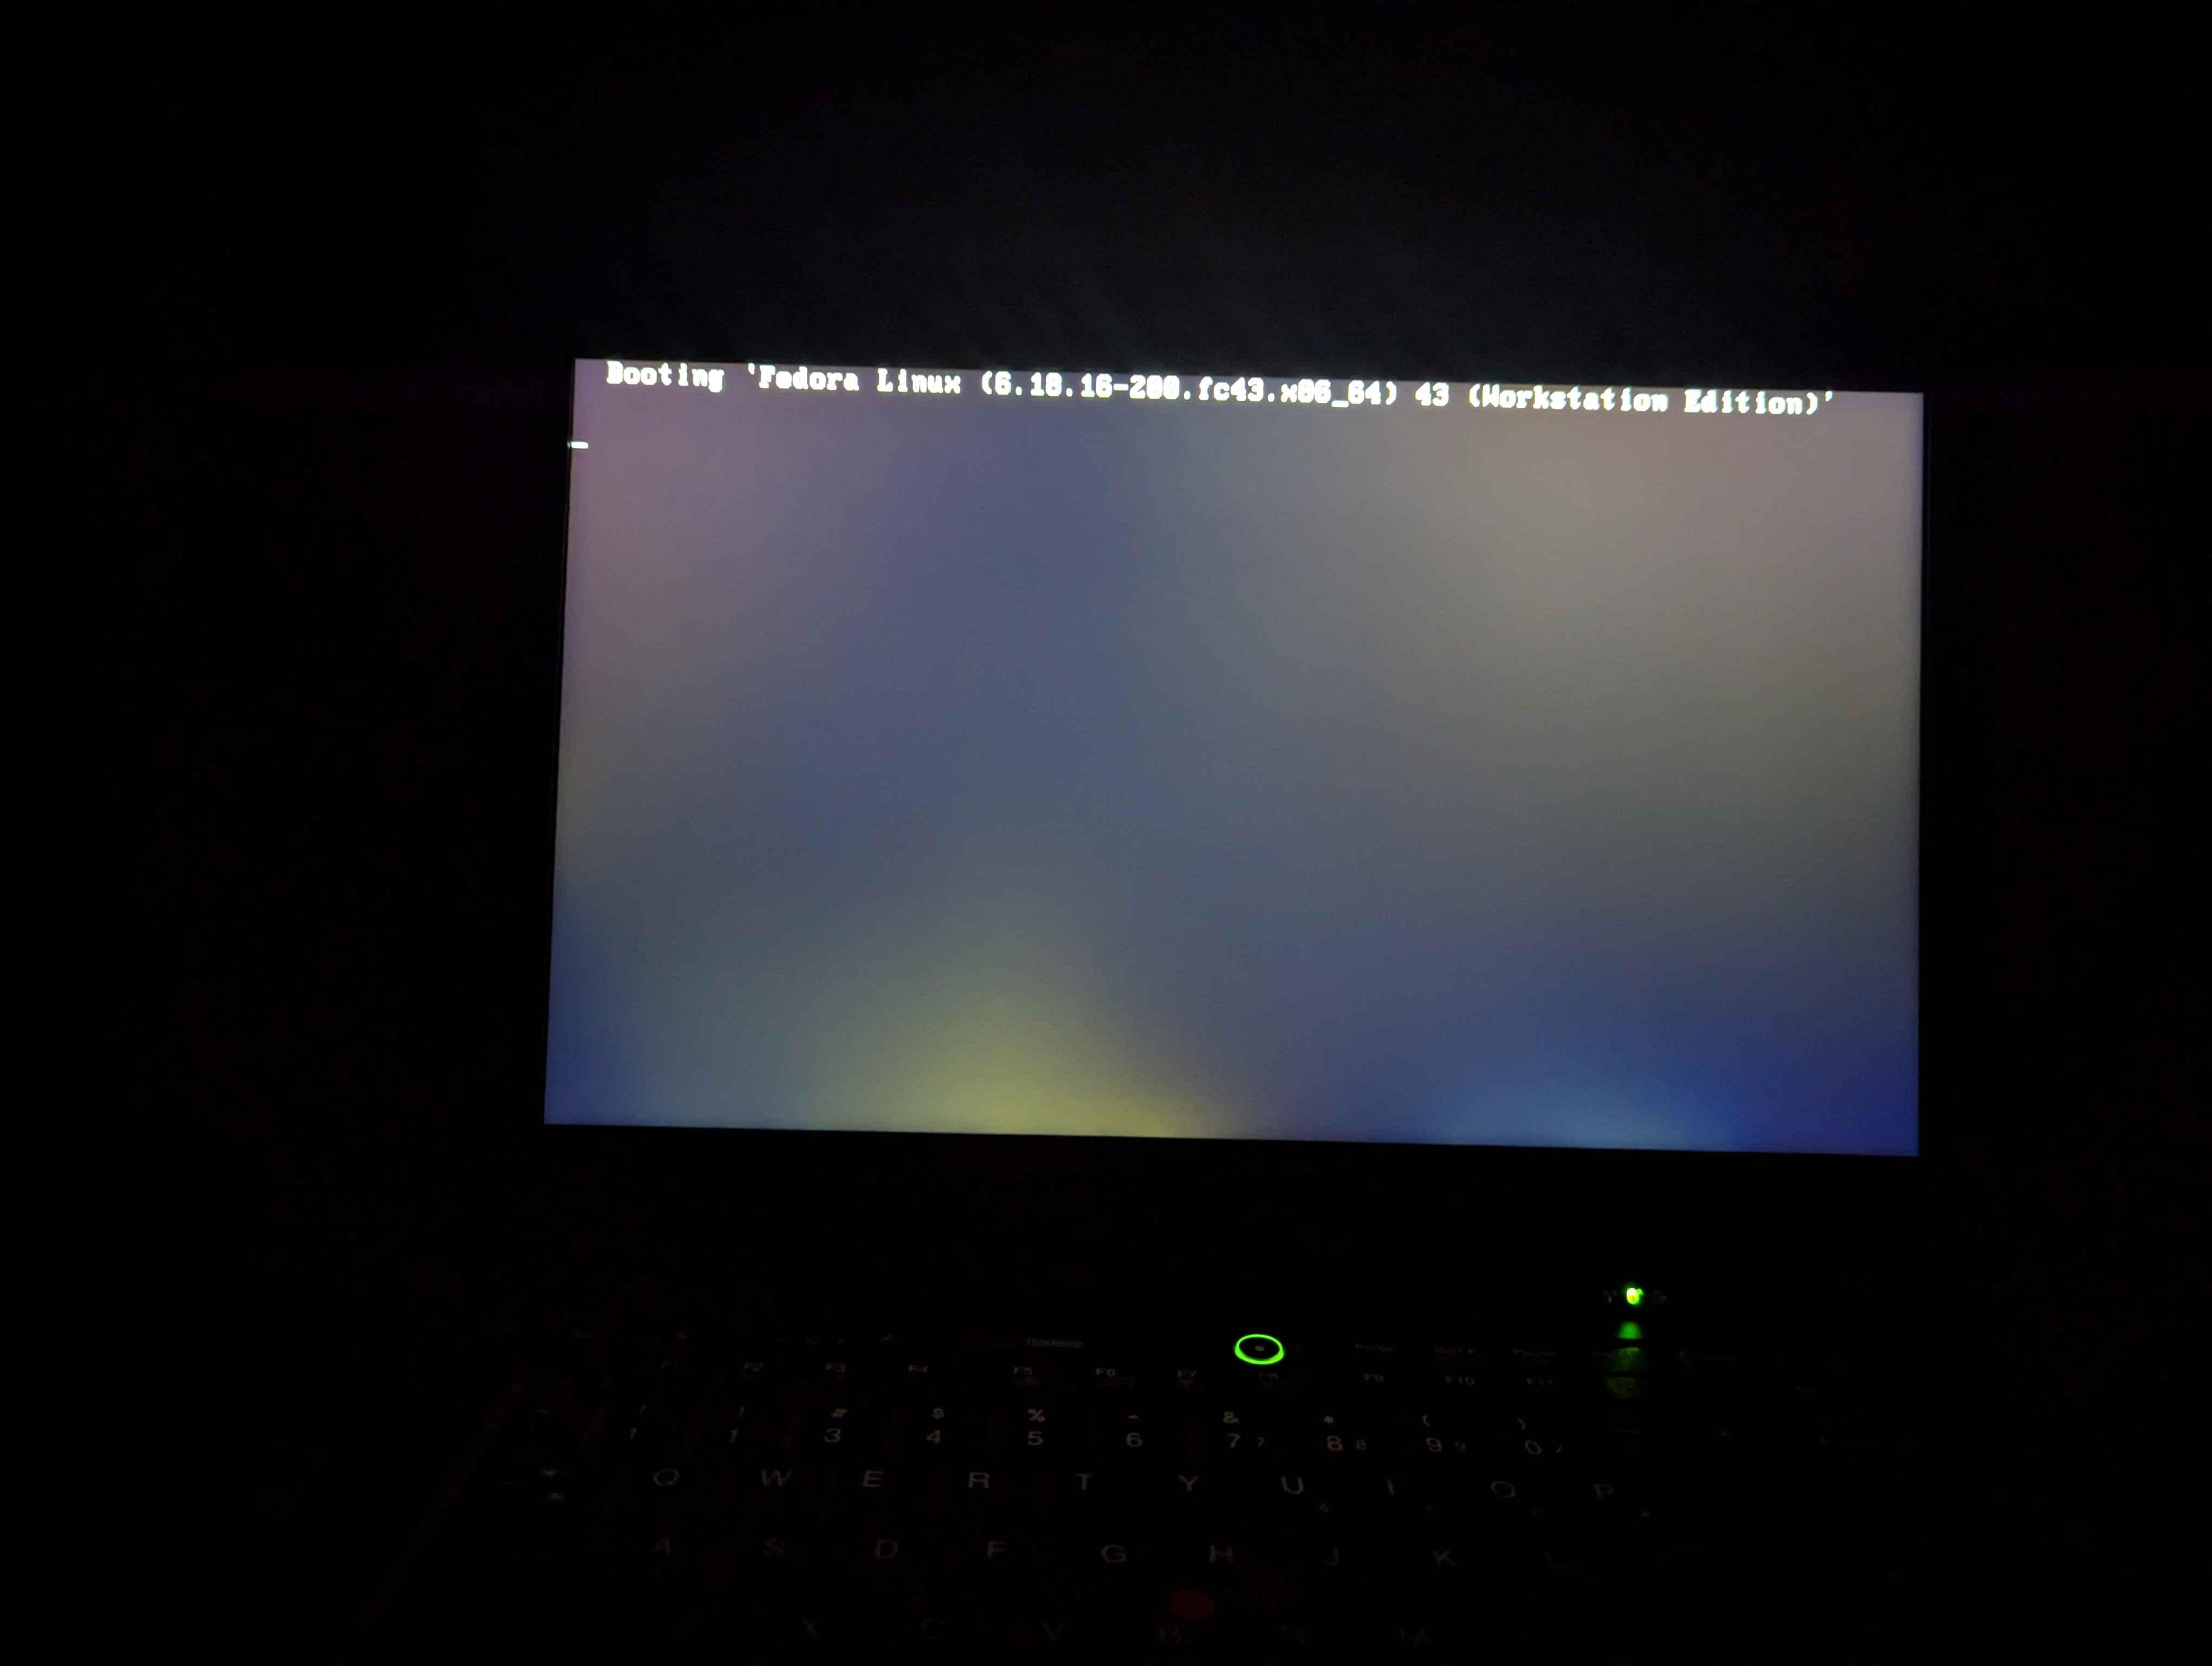
However, the aforementioned issue with the screen bending did exist, causing these white halo effects to appear. It’s not THAT bad, and I barely notice it unless if I’m on a dark area and the screen is blank. But as you can see, if both of these are true then you can really see it.
The installed screen is much better than the old one. It’s a modern IPS screen at 1080p, so it’s the same stuff that most new laptops already have. Plus, it’s got a 3-year warranty that I might never get the chance to test. In my opinion you should consider getting an upgrade kit with longer cables, so that you can maybe put it behind the keyboard (under the RAM slot) and not have to deal with the halo effect.
Upgrade 3: Keyboard
The keyboard replacement process was the most infuriating process. But not because of the installation process - that part was actually easy, and all it really takes is removing the RAM cover and screw at the center bottom, and then sliding the keyboard up to remove the cable.
The infuriating part was me going through 3 replacement keyboards to find one that was clean and actually worked properly.
To start, the original keyboard I had was really dirty, and some of the keys were stuck/sticky. Initially I tried finding proper OEM keyboards, but I decided not to because the options were double the price and had a lot of shine from frequent use. As such, the common options available were knockoffs from the same sellers selling in different accounts (Seriously, so many of these listings use the same images). So I took a shot with one keyboard for $20.
The keyboard I got initially was kinda weird. It wasn’t OEM (which is fine), but the outside metal lining was white/silver instead of black, and the Thinkvantage button was weirdly green instead of blue. This could’ve been a fine keyboard… if it actually fit. It wouldn’t go down at all, making it impossible to screw in. I returned it immediately because of this.
I ordered a second keyboard from a different seller, this time they sent me a used OEM keyboard, which I can tell because it was similar to the old keyboard. This one was clean so I kept it for a week, though it too had a weird green Thinkvantage button. I got rid of this one because, while I was trying to clean it with a lightly damp tissue, I noticed that some kind of layering was peeling off from the keycaps. Turns out that the green Thinkvantage button was not a coincidence, as they used a layer of some green chemical that hid the shine effect underneath. This is really disgusting, so I immediately returned this one and ordered a third keyboard.
I decided to order this keyboard from a different seller for $33. It too wasn’t OEM, and it had the same white lining like the first keyboard. This time, there was no weird green button, and the keyboard was clean, worked properly, and actually fit my ThinkPad! Performance-wise, the only con I found was that the trackpoint feels stuttery compared to the OEM keyboard, but it was still usable, and the keys feel the exact same.
Part of the infuriating process is that you are basically rolling a dice when it comes to buying a non-OEM keyboard, especially if you want something that feels freshly new. If you don’t want to deal with this hassle, the next best option is to just buy an OEM keyboard, that is if you’re fine paying upwards of $50 for one, and that you’re fine with a used keyboard that has a bunch of shiny keys with it.
Intermission
With the first 3 upgrades out of the way, I decided to spend this time actually playing around with the ThinkPad. At first, I was testing out the specs with the laptop. That meant running light games and making a bunch of website tabs, and a benchmark test to see how well it can run programs. It runs just as well as I expected, which was not very well. In its current state, I don’t think I can comfortably daily-drive it without lagging and stuttering all the time, so I needed plans for upgrades. I was also concerned with the CPU temperatures, as they were constantly running hot at over 95 degrees Celsius.
In the meantime, I had a blast installing a bunch of different operating systems. I tried a few bootleg copies of Windows 7 from CrustyWindows, most of these were just modified copies of Windows with added (or removed) features and programs, plus special theming and possibly malware. None of which I would actually use as my final OS though.
While I was there, I also went ahead and installed the latest BIOS update from the Lenovo site. For some reason it would not run on Windows 10, but it’ll work perfectly on Windows 7. This’ll be needed for a BIOS mod later.
Upgrade 4: SSD
The 320GB hard drive is pretty slow as a boot drive. Luckily, I already had a spare 250GB SSD that I can just replace it with, and that will make things run somewhat faster.
The old drive won’t be going to waste, as I found a hard drive caddy that I can replace the CD-ROM tray with, so I can use both drives at the same time with a total of 570 gigs of storage. I never use the CD drive anyway, and if I have to, I can easily swap the caddy with the CD drive with just a lever pull on the bottom of the ThinkPad.
The only problem with this approach is that I cannot use the caddy as a boot drive, but that’s fine because I can just use the main SSD for my operating system and the hard drive will just be used for programs and whatnot.
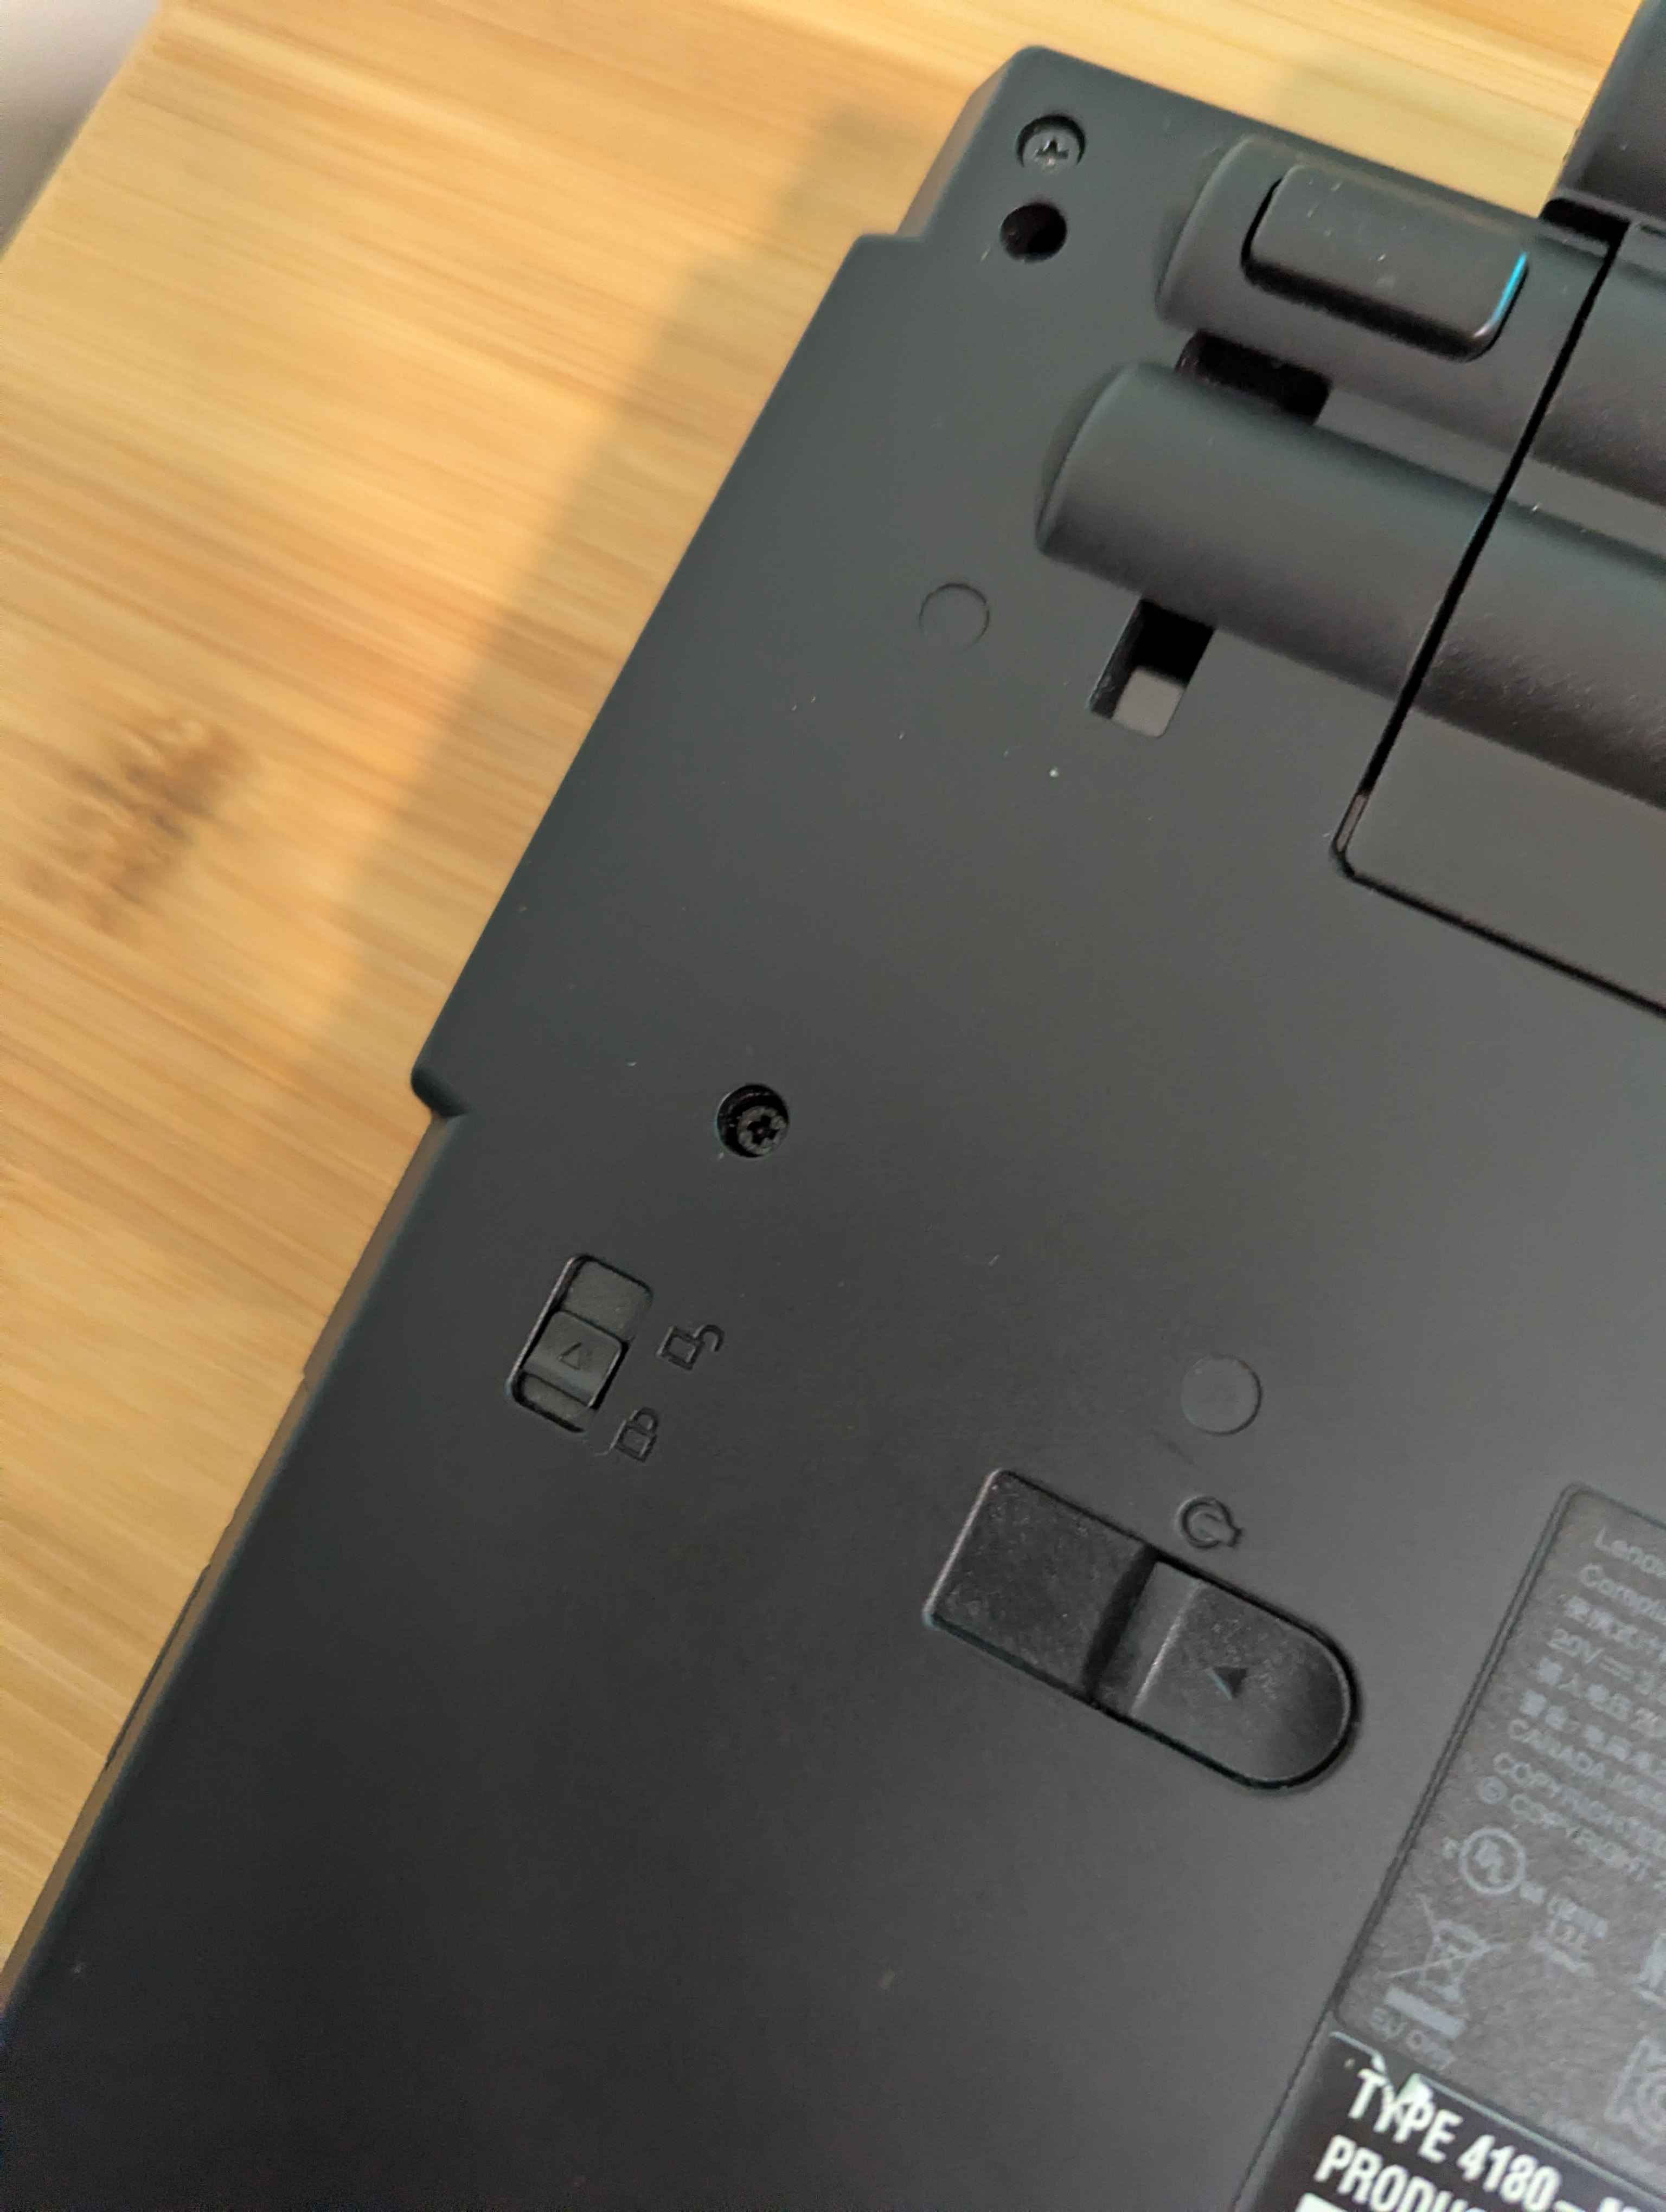
Another thing I noticed was that there’s a small locking lever next to the drive. This came broken with my ThinkPad as it just moves freely without staying in place. From what I heard, this seems to be a common problem with an internal spring falling off. I did find replacement parts out there, but I never bothered to fully fix it, so that’s something you might want to check out.
Upgrade 5: Coreboot
Ok, before we go any further, we should discuss the future upgrades that will be done for the ThinkPad.
Physically, the ThinkPad can take in CPUs with the Sandy Bridge (2xxx) and Ivy Bridge (3xxx) architecture, any kind of DDR3 SODIMM stick, and a Mini PCIE card for Wi-Fi. However, the ThinkPad’s stock BIOS limits our options to only Sandy Bridge CPUs, RAM with limited speeds, and Wi-Fi whitelisted cards that are stuck at Wi-Fi 4 speeds.
In order to get past all of these blocks, we’ll need to change the stock BIOS to a modified one that doesn’t have any whitelists or hardware limitations. Hence why I decided to flash Coreboot into my ThinkPad.
This process is going to be tedious as it can’t be done with just a program like our BIOS update from before. We’ll need to flash it physically with special hardware and with a borrowed laptop running Linux. It will also require a complete disassembly of the ThinkPad, so make sure you have ample desk space to store its parts!
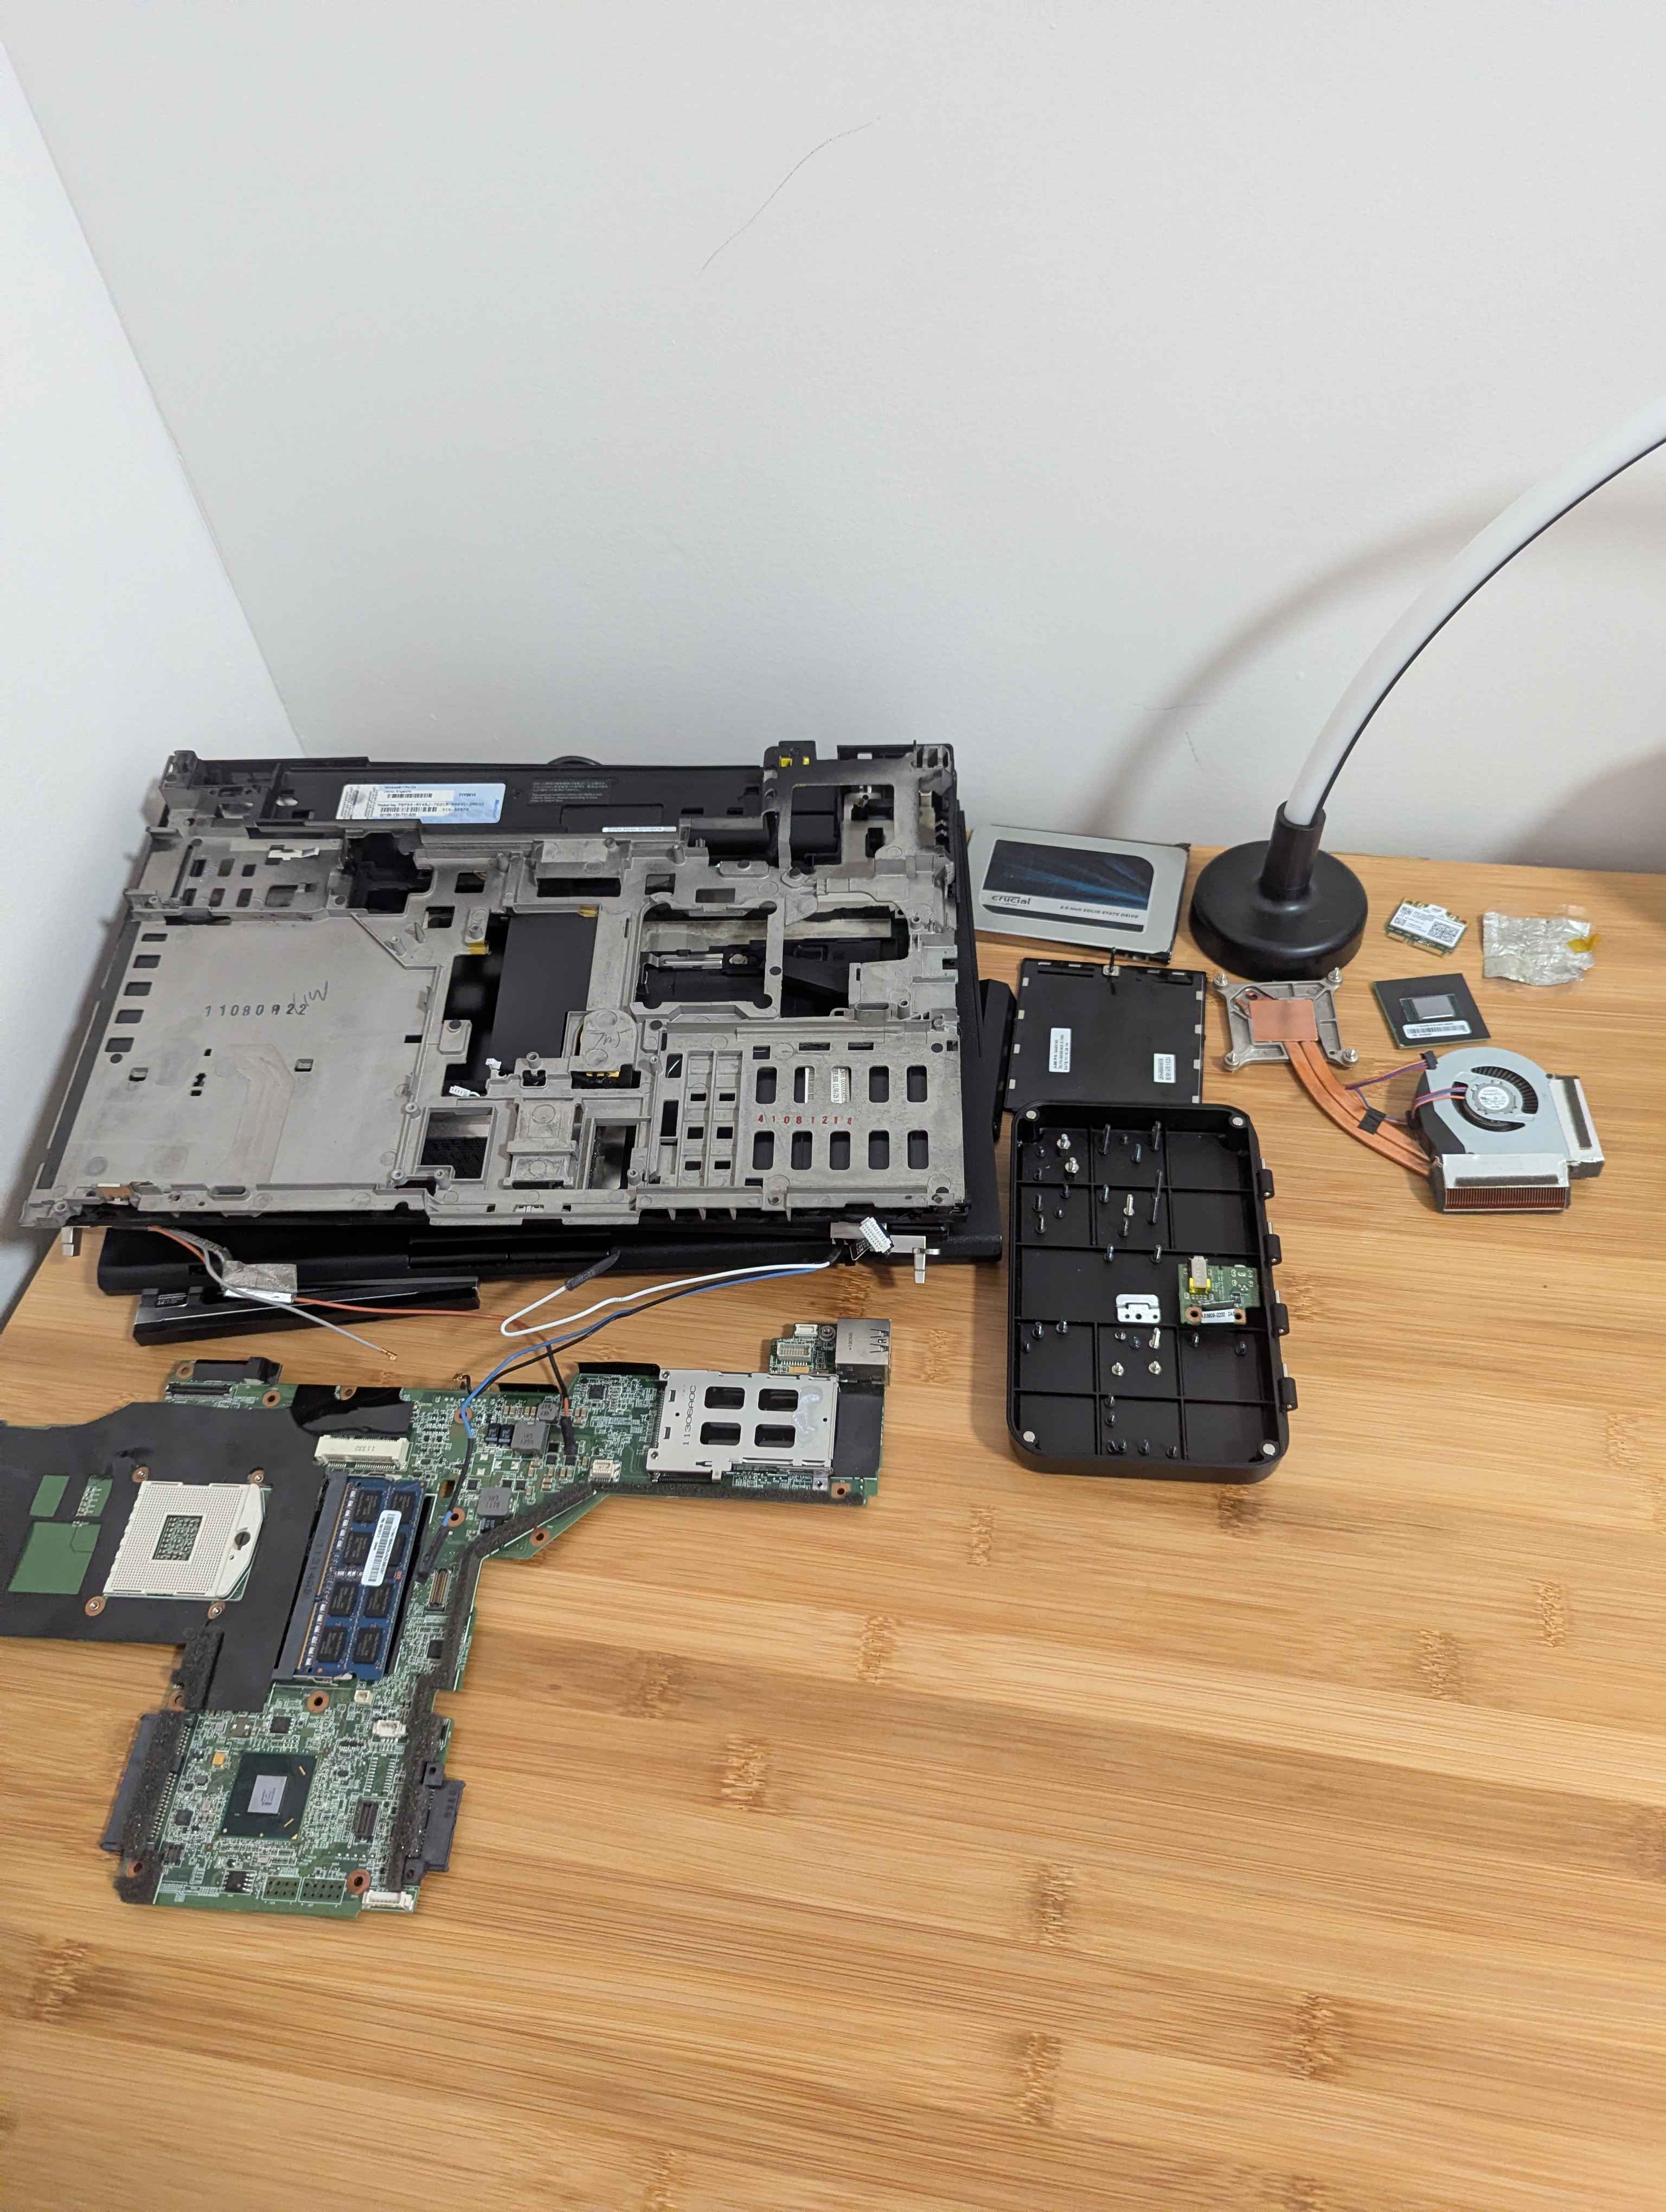
Here’s a list of stuff that I needed to get:
- A USB CH341A flash programmer. The one I bought was this kit for $14, but I honestly overpaid as I only needed to use one of the helper parts, and the black clip just did not fit. You can spend less with just the programmer itself
- A 120-pack of jumper wires that come in three different forms. This cost me $6 but I only needed to use eight of the male-to-female connectors.
- A Pomona Electronics 5250 SOIC Clip in blue. I ended up not needing this as the jumper cables mentioned above worked well by themselves.
After the disassembly, I plugged in the flash programmer to my working laptop, and on it I attached one of those “dual-use boards” and the 8 cables onto it. The reason I did it this way (instead of just directly to a female-to-female cable) was that I was having placement issues, and the board was somewhat useful as a guide. I would also recommend grouping the cables by 4 instead of having eight separate cables to manually manage.
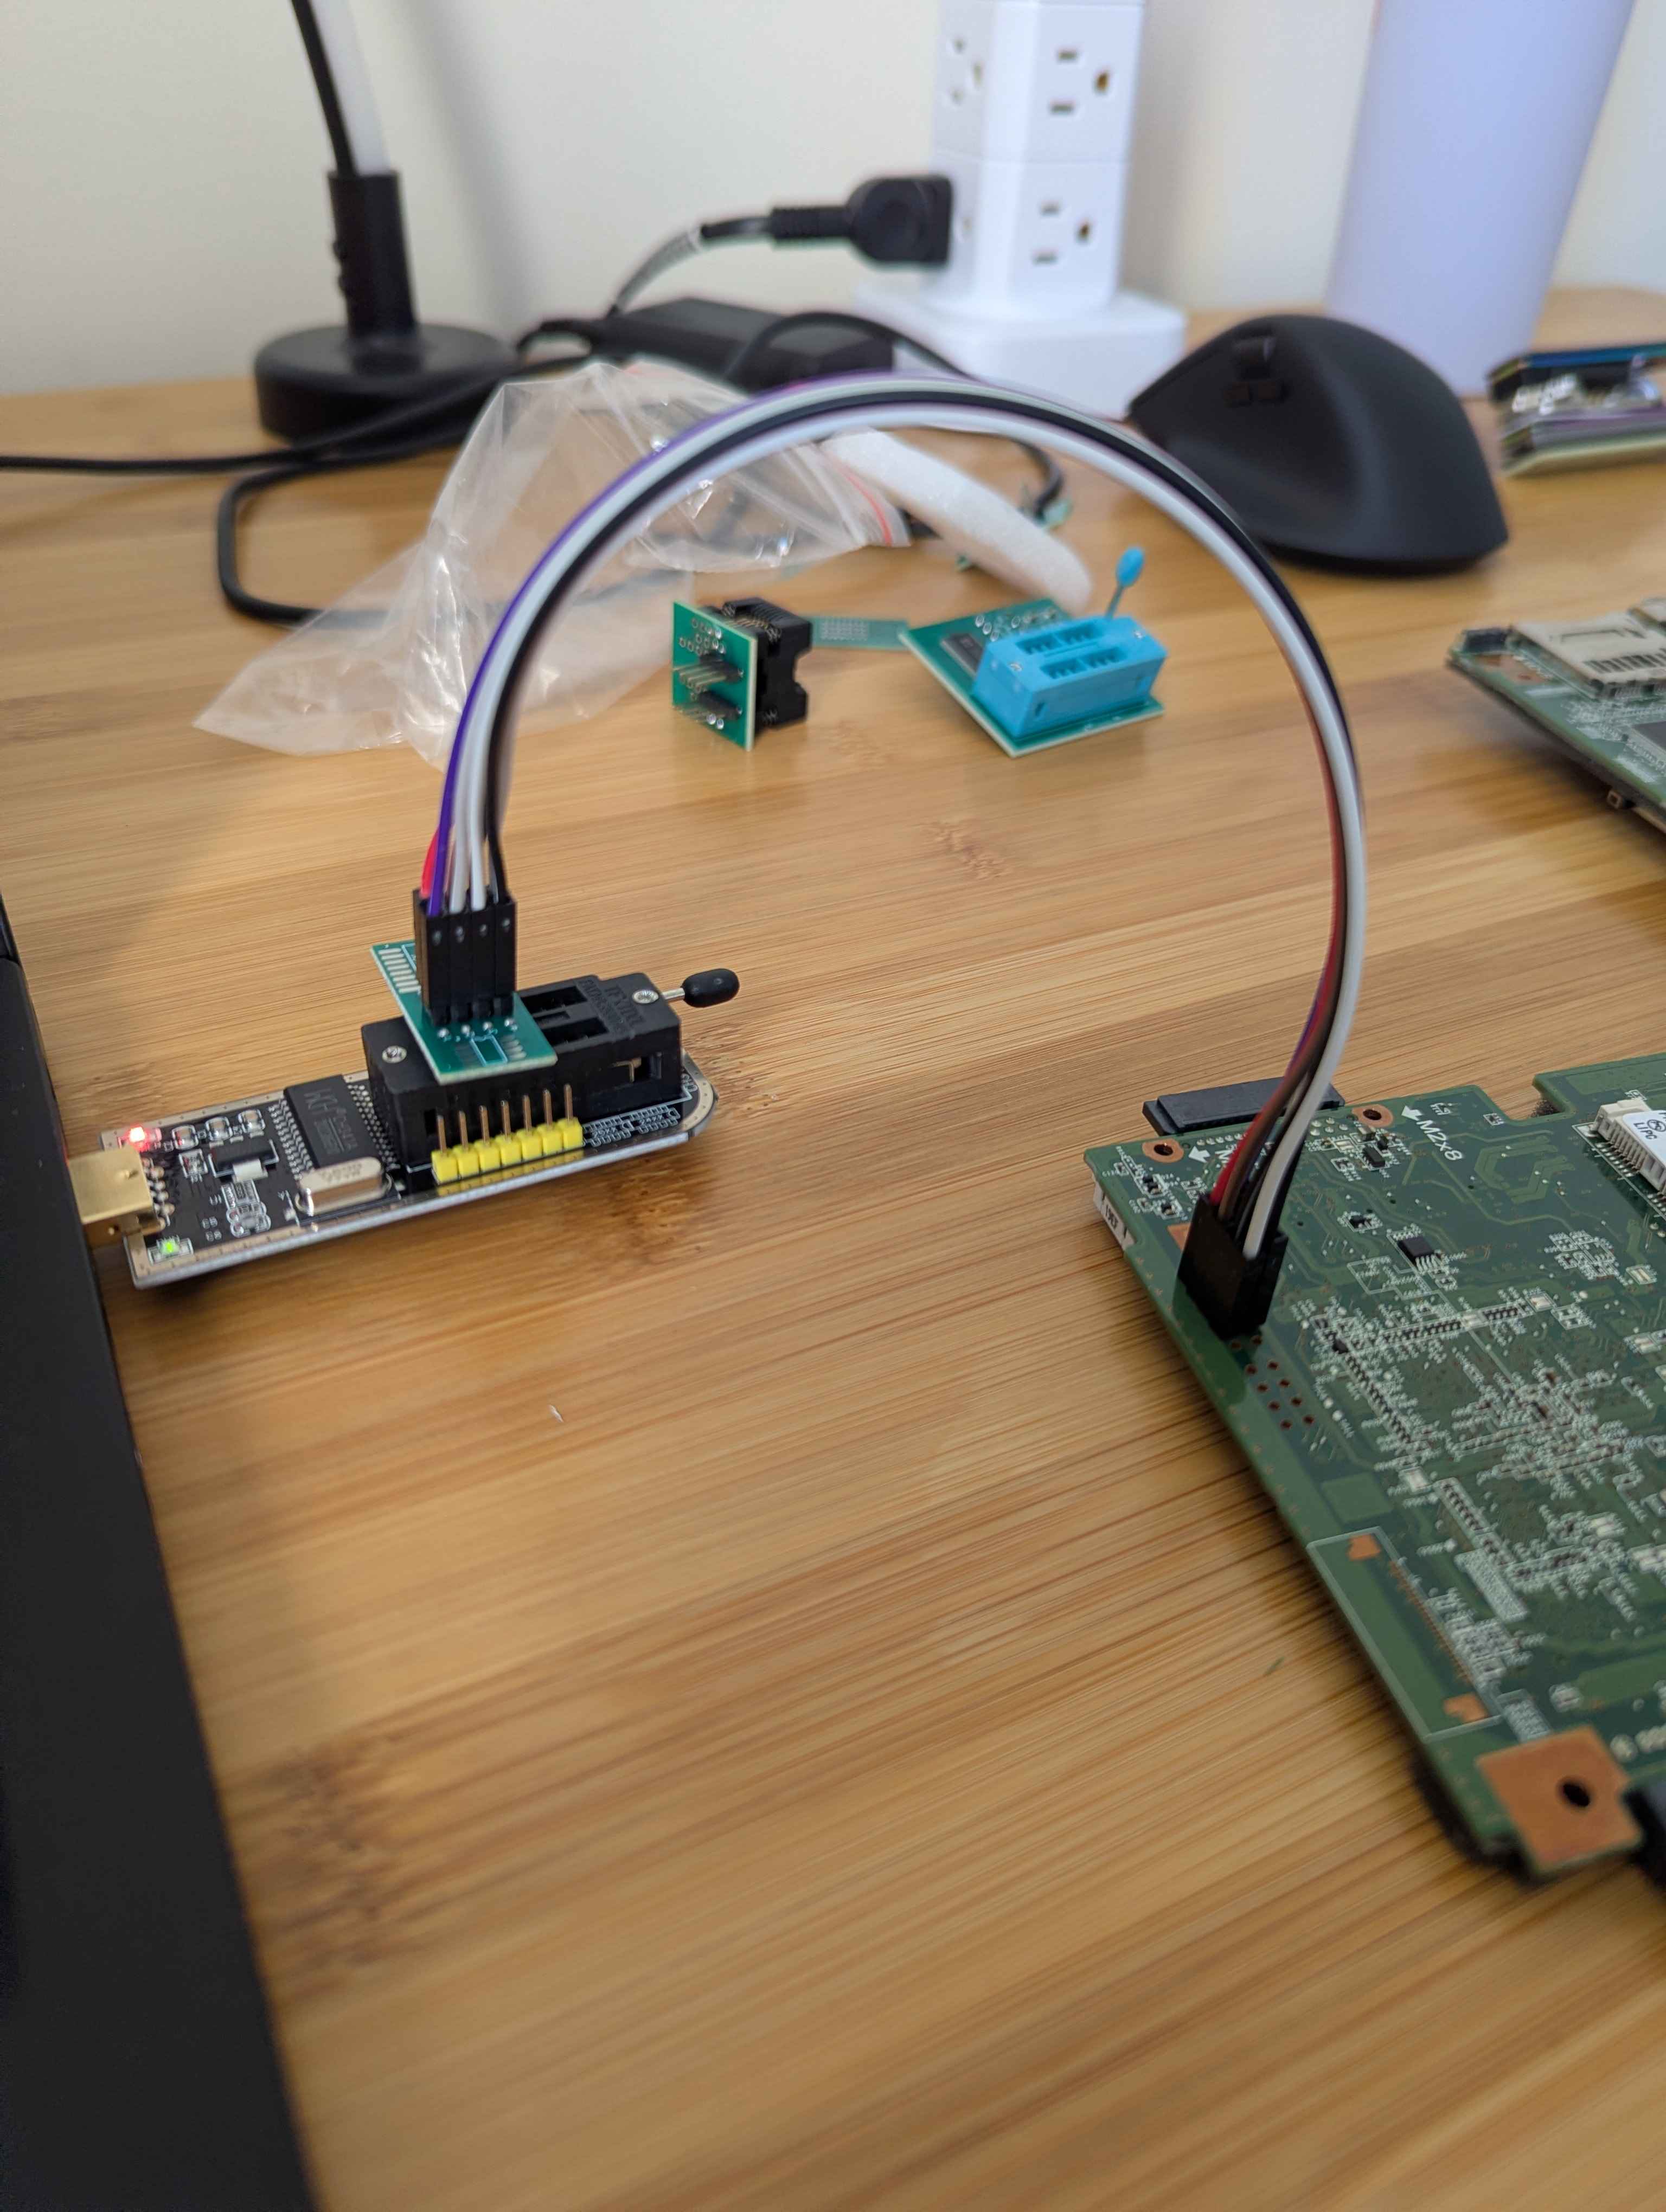
As you can see from this image, I had to flip the motherboard and place the pins to the leftmost holes. From the flash programmer, I started with the back (left from the USB side) row of cables, flipped it, and then put it to the front row of the holes, and then did the same thing with the second row of cables. This made the flashing process a lot easier than how others normally do it, and I never needed to solder nor did I encounter errors or issues during the flashing or backup process.
Once the physical side is set up, the rest of the work will be done at the laptop. We need to install the Coreboot source code and set it up so that it will compile the BIOS file that we need. We’ll also be using flashrom to get the stock BIOS to our laptop, then send the modded BIOS into the ThinkPad.
I won’t go through this step-by-step. Instead, I’ll just list out the exact commands that I used throughout this process. If you need further explanations, I strongly recommend that you go through the guides that I used, such as the one from John Ling, which helped me with finding the exact commands and config options to use, and from florstat, which helped me with setting up the flash programmer.
sudo pacman -S base-devel gcc-ada flex bison ncurses wget zlib git flashrom
git clone https://github.com/coreboot/coreboot.git
cd coreboot
git submodule update --init --checkout
mkdir -p 3rdparty/blobs/mainboard/lenovo/t420
cd util/ifdtool
make -j(nproc) -l(math (nproc) + 1) # bash: make -j$(nproc) -l$(($(nproc) + 1))
Then we need to extract the original BIOS. I would need to do this 3 times to make sure that I have a stable connection. This will take a while…
flashrom -VVV -p ch341a_spi -c MX25L6406E/MX25L6408E -r t420_1.rom
flashrom -VVV -p ch341a_spi -c MX25L6406E/MX25L6408E -r t420_2.rom
flashrom -VVV -p ch341a_spi -c MX25L6406E/MX25L6408E -r t420_3.rom
sha512sum t420_*.rom    # Check if they match!
cp t420_1.rom backup.rom

./ifdtool -x backup.rom
mv flashregion_0_flashdescriptor.bin descriptor.bin
rm flashregion_1_bios.bin
mv flashregion_2_intel_me.bin me.bin
mv flashregion_3_gbe.bin gbe.bin
cp descriptor.bin me.bin gbe.bin ../../3rdparty/blobs/mainboard/lenovo/t420/

cd ../..
make nconfig
Within the configuration screen, there’s a bunch of things we need to set. To make things simple I’ll just include the .config file that you need to put on the coreboot directory. You should still check over the options.
make crossgcc-i386 CPUS=$(nproc)
make iasl
make -j(nproc) -l(math (nproc) + 1) # bash: make -j$(nproc) -l$(($(nproc) + 1))
With that done we finally have our new BIOS ready! Now we just have to flash it:
flashrom -VVV -p ch341a_spi -c MX25L6406E/MX25L6408E -w build/coreboot.rom
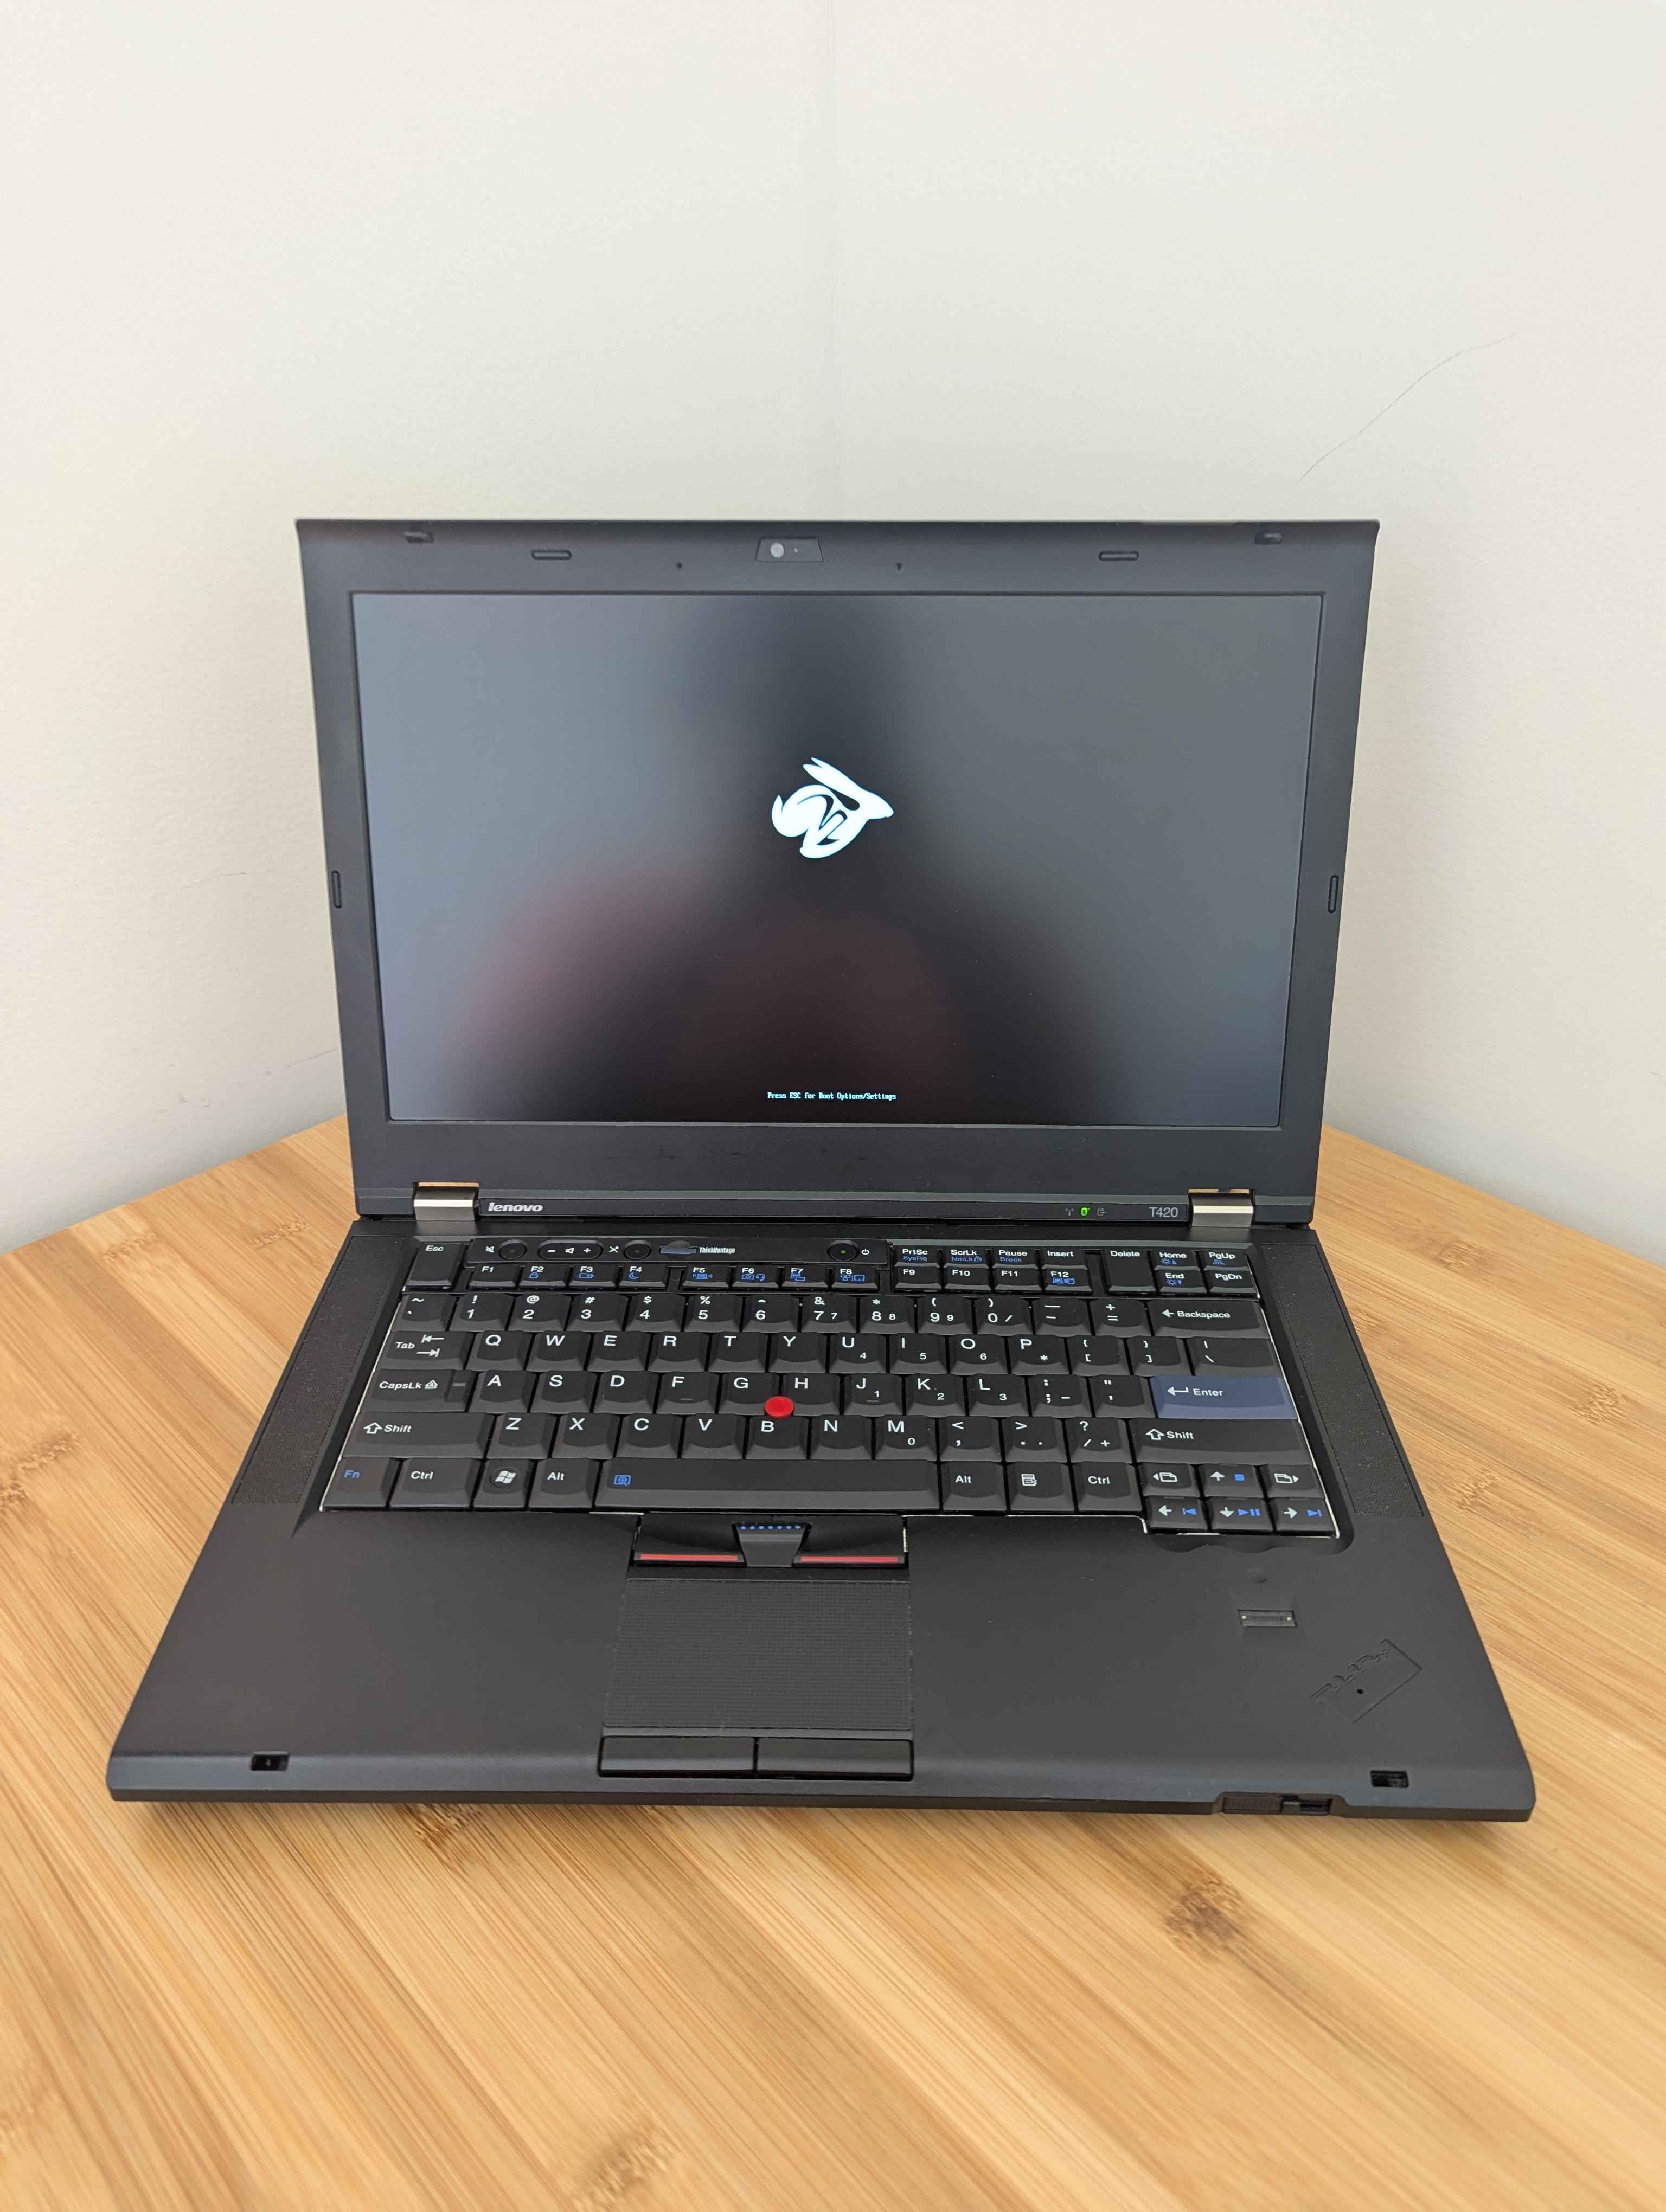
And we’re done! After putting everything back together, I was able to turn on the ThinkPad and see the new Coreboot boot screen in all its glory.
That was a lengthy process. The good thing is that, if you ever need to make BIOS changes for some reason, you don’t need to do all this work anymore. You can simply run flashrom on Linux using the internal programmer by setting -p internal instead of CH341A.
Either way, I probably wouldn’t have been able to do this without the guides I mentioned before, so please check them out as they contain a lot more info about this process than I listed here. By the time I’m writing this, I noticed that John Ling updated his guide to ditch the CH341A programmer in favor of flashing the BIOS with a Raspberry Pi Pico, so that’s worth checking out if you want a less risky alternative.
Installing OS
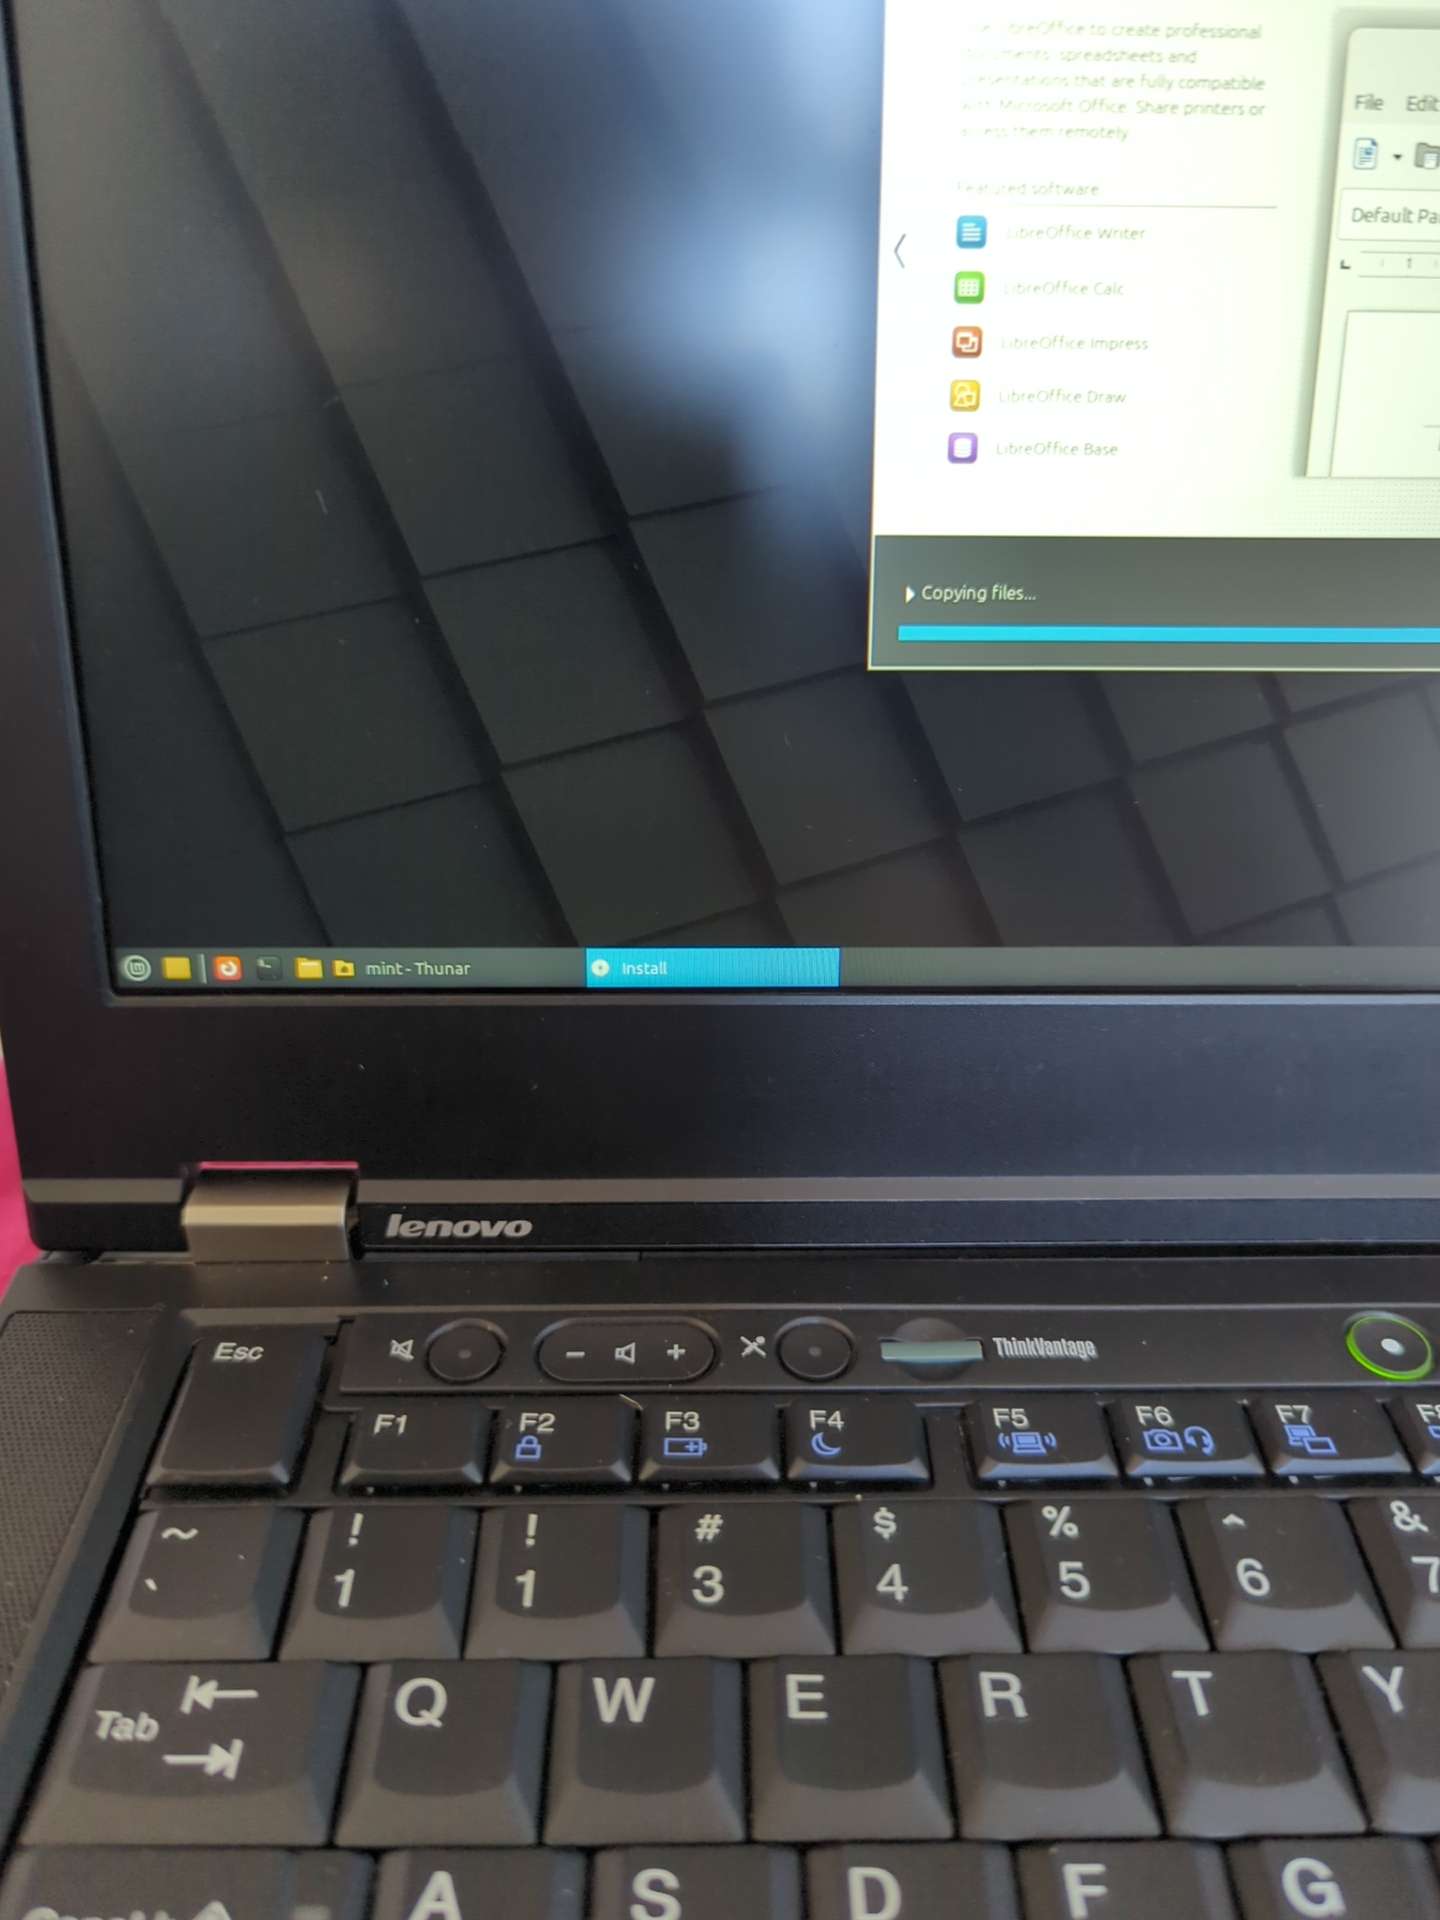
Although I mentioned that I tested a bunch of Windows 7 bootlegs, I knew that I’d rather just install the base Windows 10 and dual-boot it with Linux. After trying a few distros, I just decided to keep it simple and just install Linux Mint alongside Windows 10.
In every Windows install I make sure to use Chris Titus Tool to quickly install some necessary apps and to do some debloating/optimizations that will definitely help with performance on this aging hardware.
Upgrade 6: CPU
For this upgrade I decided to split it into two parts - upgrading the CPU itself and upgrading the CPU cooler.
For the CPU itself, I decided to go with an Ivy Bridge CPU, specifically the i7-3840QM. Unlike the old CPU, this one has 4 cores instead of 2, and runs about 300-600MHz faster. As such, it’s significantly faster than what I had before, and it’s probably the best CPU that the T420 can safely handle. The only con is that it uses 45 watts instead of the previous 35, which makes it run hotter and use more energy. I found one for $54, which seems to be the standard price right now.
I also decided to replace the CPU cooler because it was always running super hot, even at idle. I’m not sure exactly why this happens, as I tried replacing the thermal paste and that didn’t seem to fix the issue. My only guess is that the copper pipe has lost its thermal conductivity with 15 years of use.
Instead of an exact replacement, I got one for $36 that was made for the iGPU variant of the ThinkPad. The difference here is that it contains an extra copper pipe that would typically cool a graphics chip that came with some ThinkPad T420s, which I don’t have. Instead we’ll fuse the three copper pipes with some copper tape. Just 3 or 4 layers is probably enough, though I might have gone a bit more than that. Either way I had to make sure it was compacted and that it would actually fit. I then put a layer of kapton tape around the area to make sure that it doesn’t short-circuit. Oh, and I also used the same tape to keep the cables organized inside the ThinkPad.
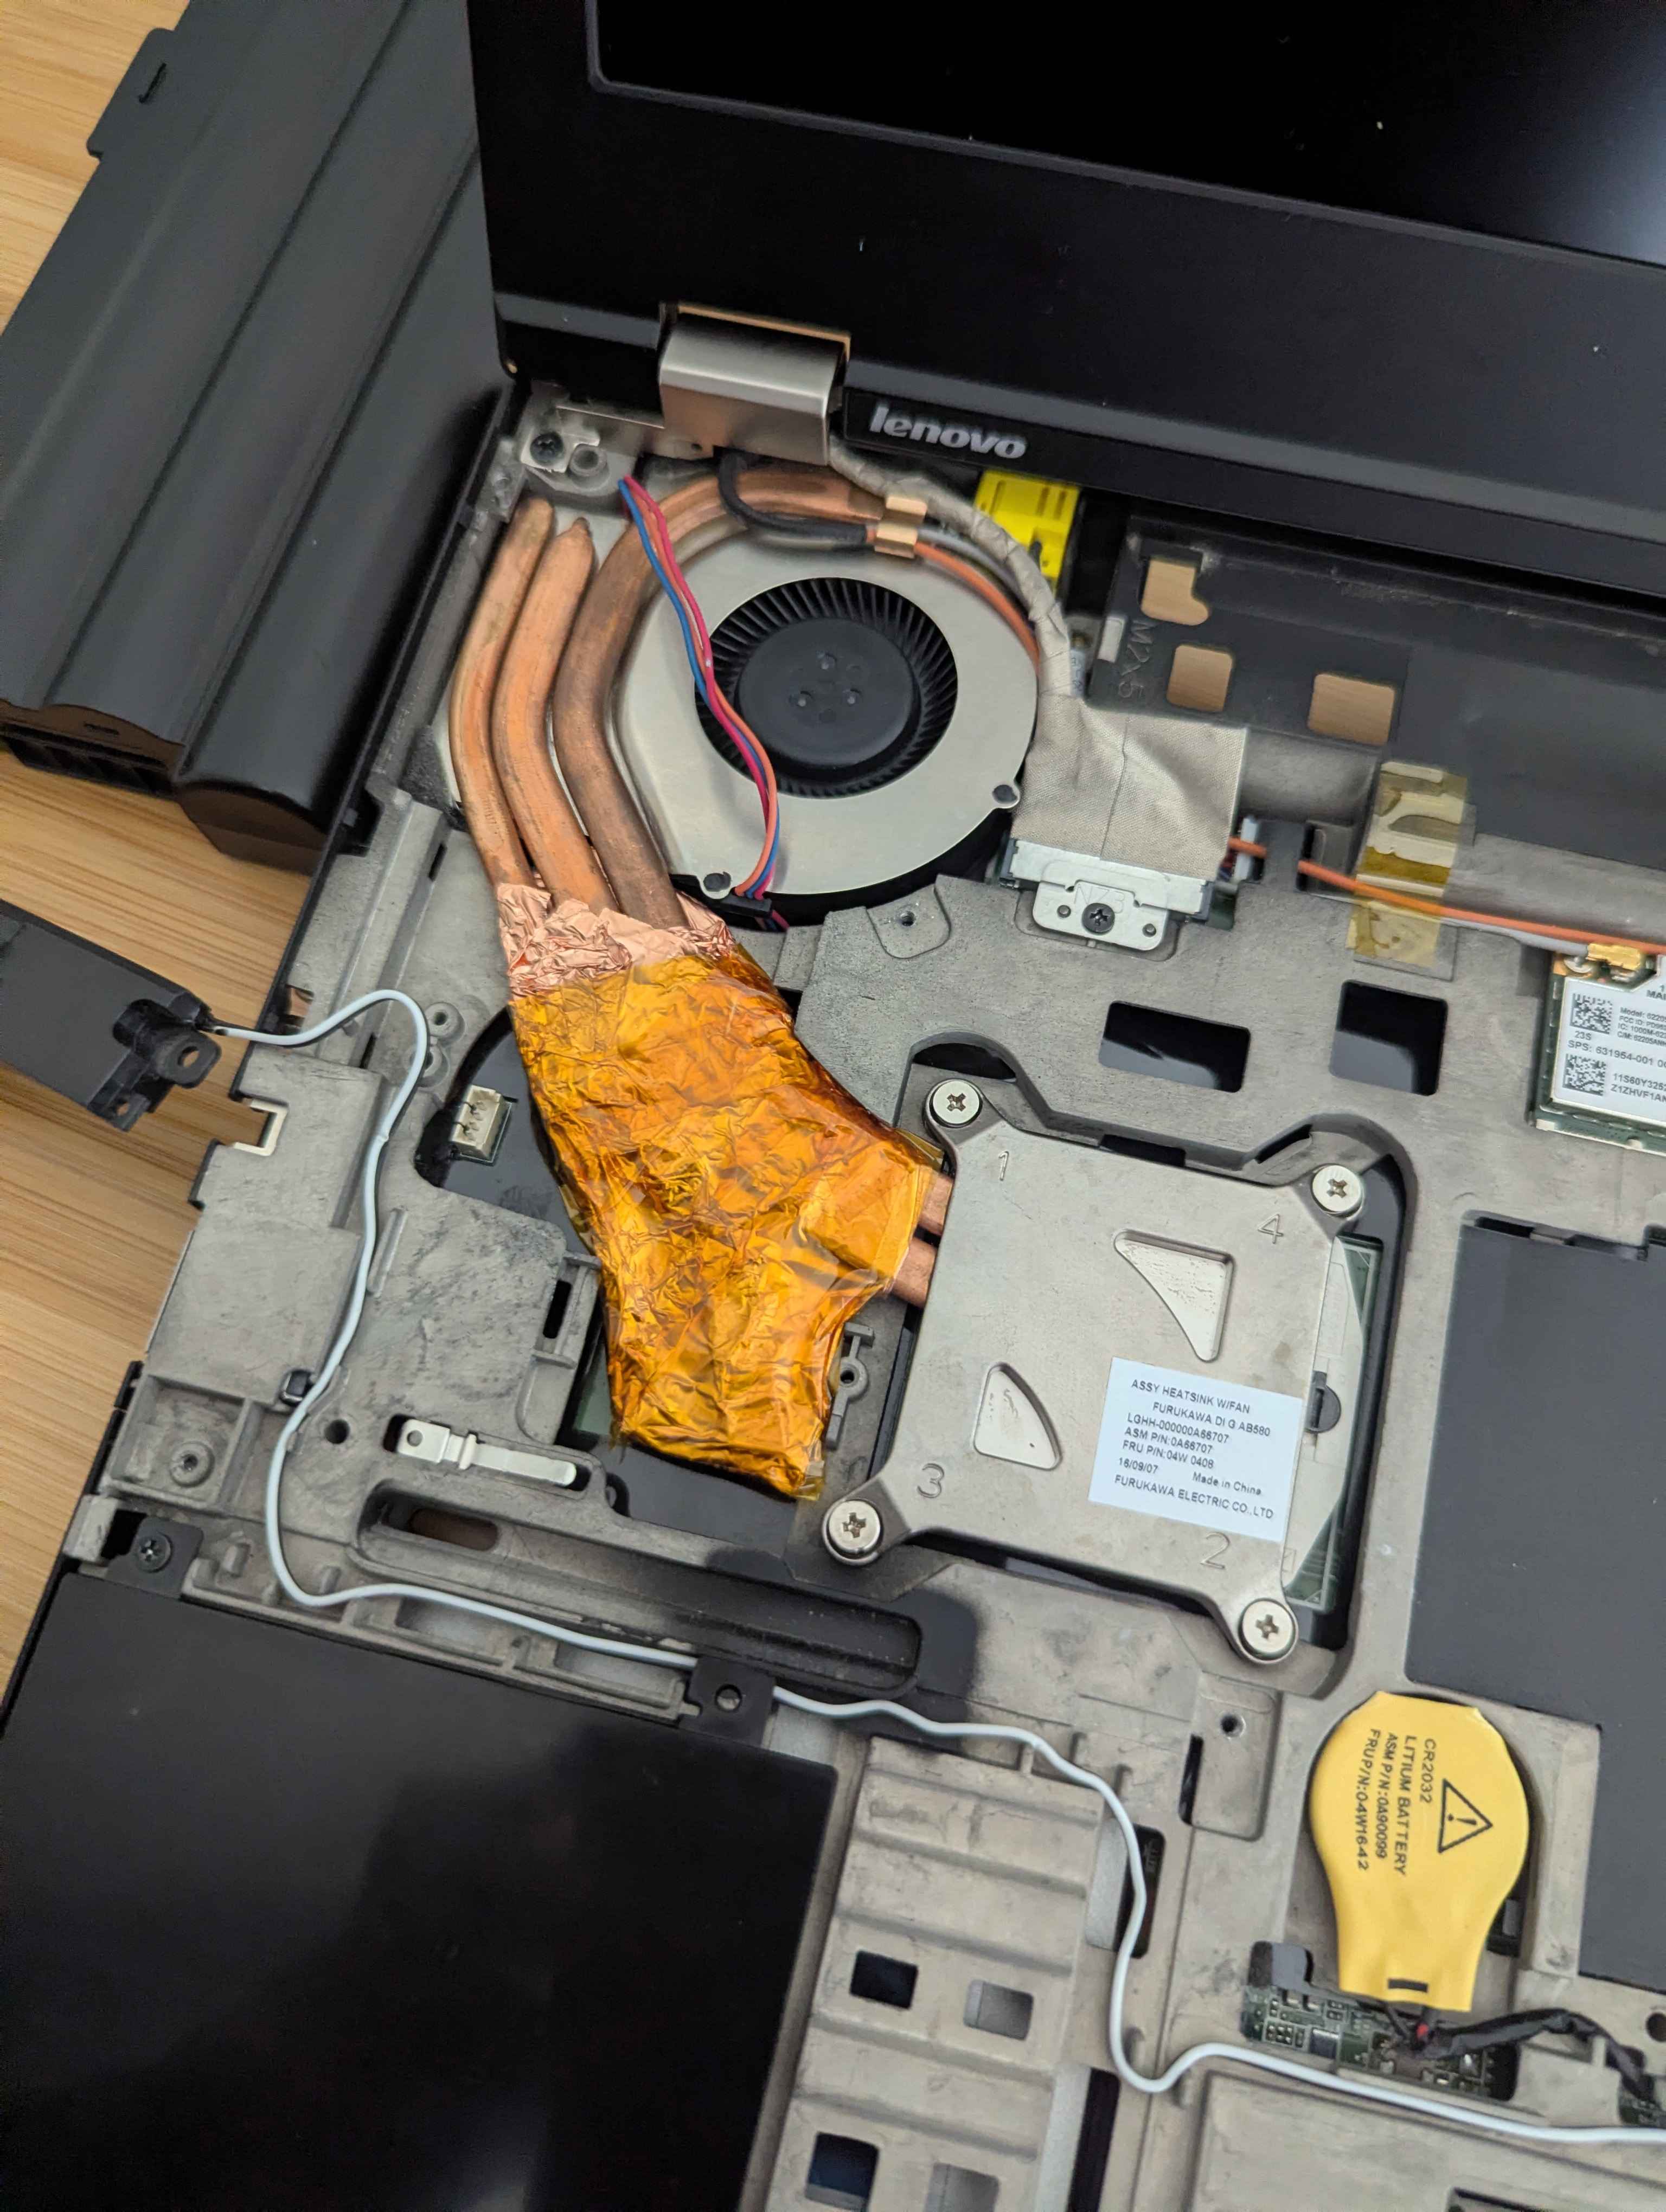
This setup definitely helped with performance and cooling with the new CPU. Despite running at 15 watts extra, this thing runs at around 40-50C at idle, and in the mid-80s at full throttle during stress testing.
Upgrade 7: RAM
The RAM definitely needs an upgrade at 4 gigabytes. There’s space for two RAM sticks (one is under the RAM cover at the bottom, and another is behind the keyboard), and the maximum capacity we can actually get on our ThinkPad is 16GB.
The RAM kit I bought was a Crucial 2x8GB kit in DDR3L-1866 SODIMM. It was the cheapest RAM kit I could buy at around $41. I just plugged it in and it seemed to work perfectly fine.
In theory, with me using Coreboot, I should be able to use the faster RAM speeds at 1866MHz instead of the stock 1600MHz. However, this never worked for me, and it was just stuck at 1600MHz. That’s when I realized that the ThinkPad doesn’t fully support DDR3L RAM, as the RAM expects it to run at 1.35 volts for the full speed, but the ThinkPad is always supplying it with 1.5 volts with no way to change it. I didn’t think it was too big of a deal for me to return it, since it still worked fine and Memtest86 showed the RAM is functioning fine; it’s just that it will run slightly slower.
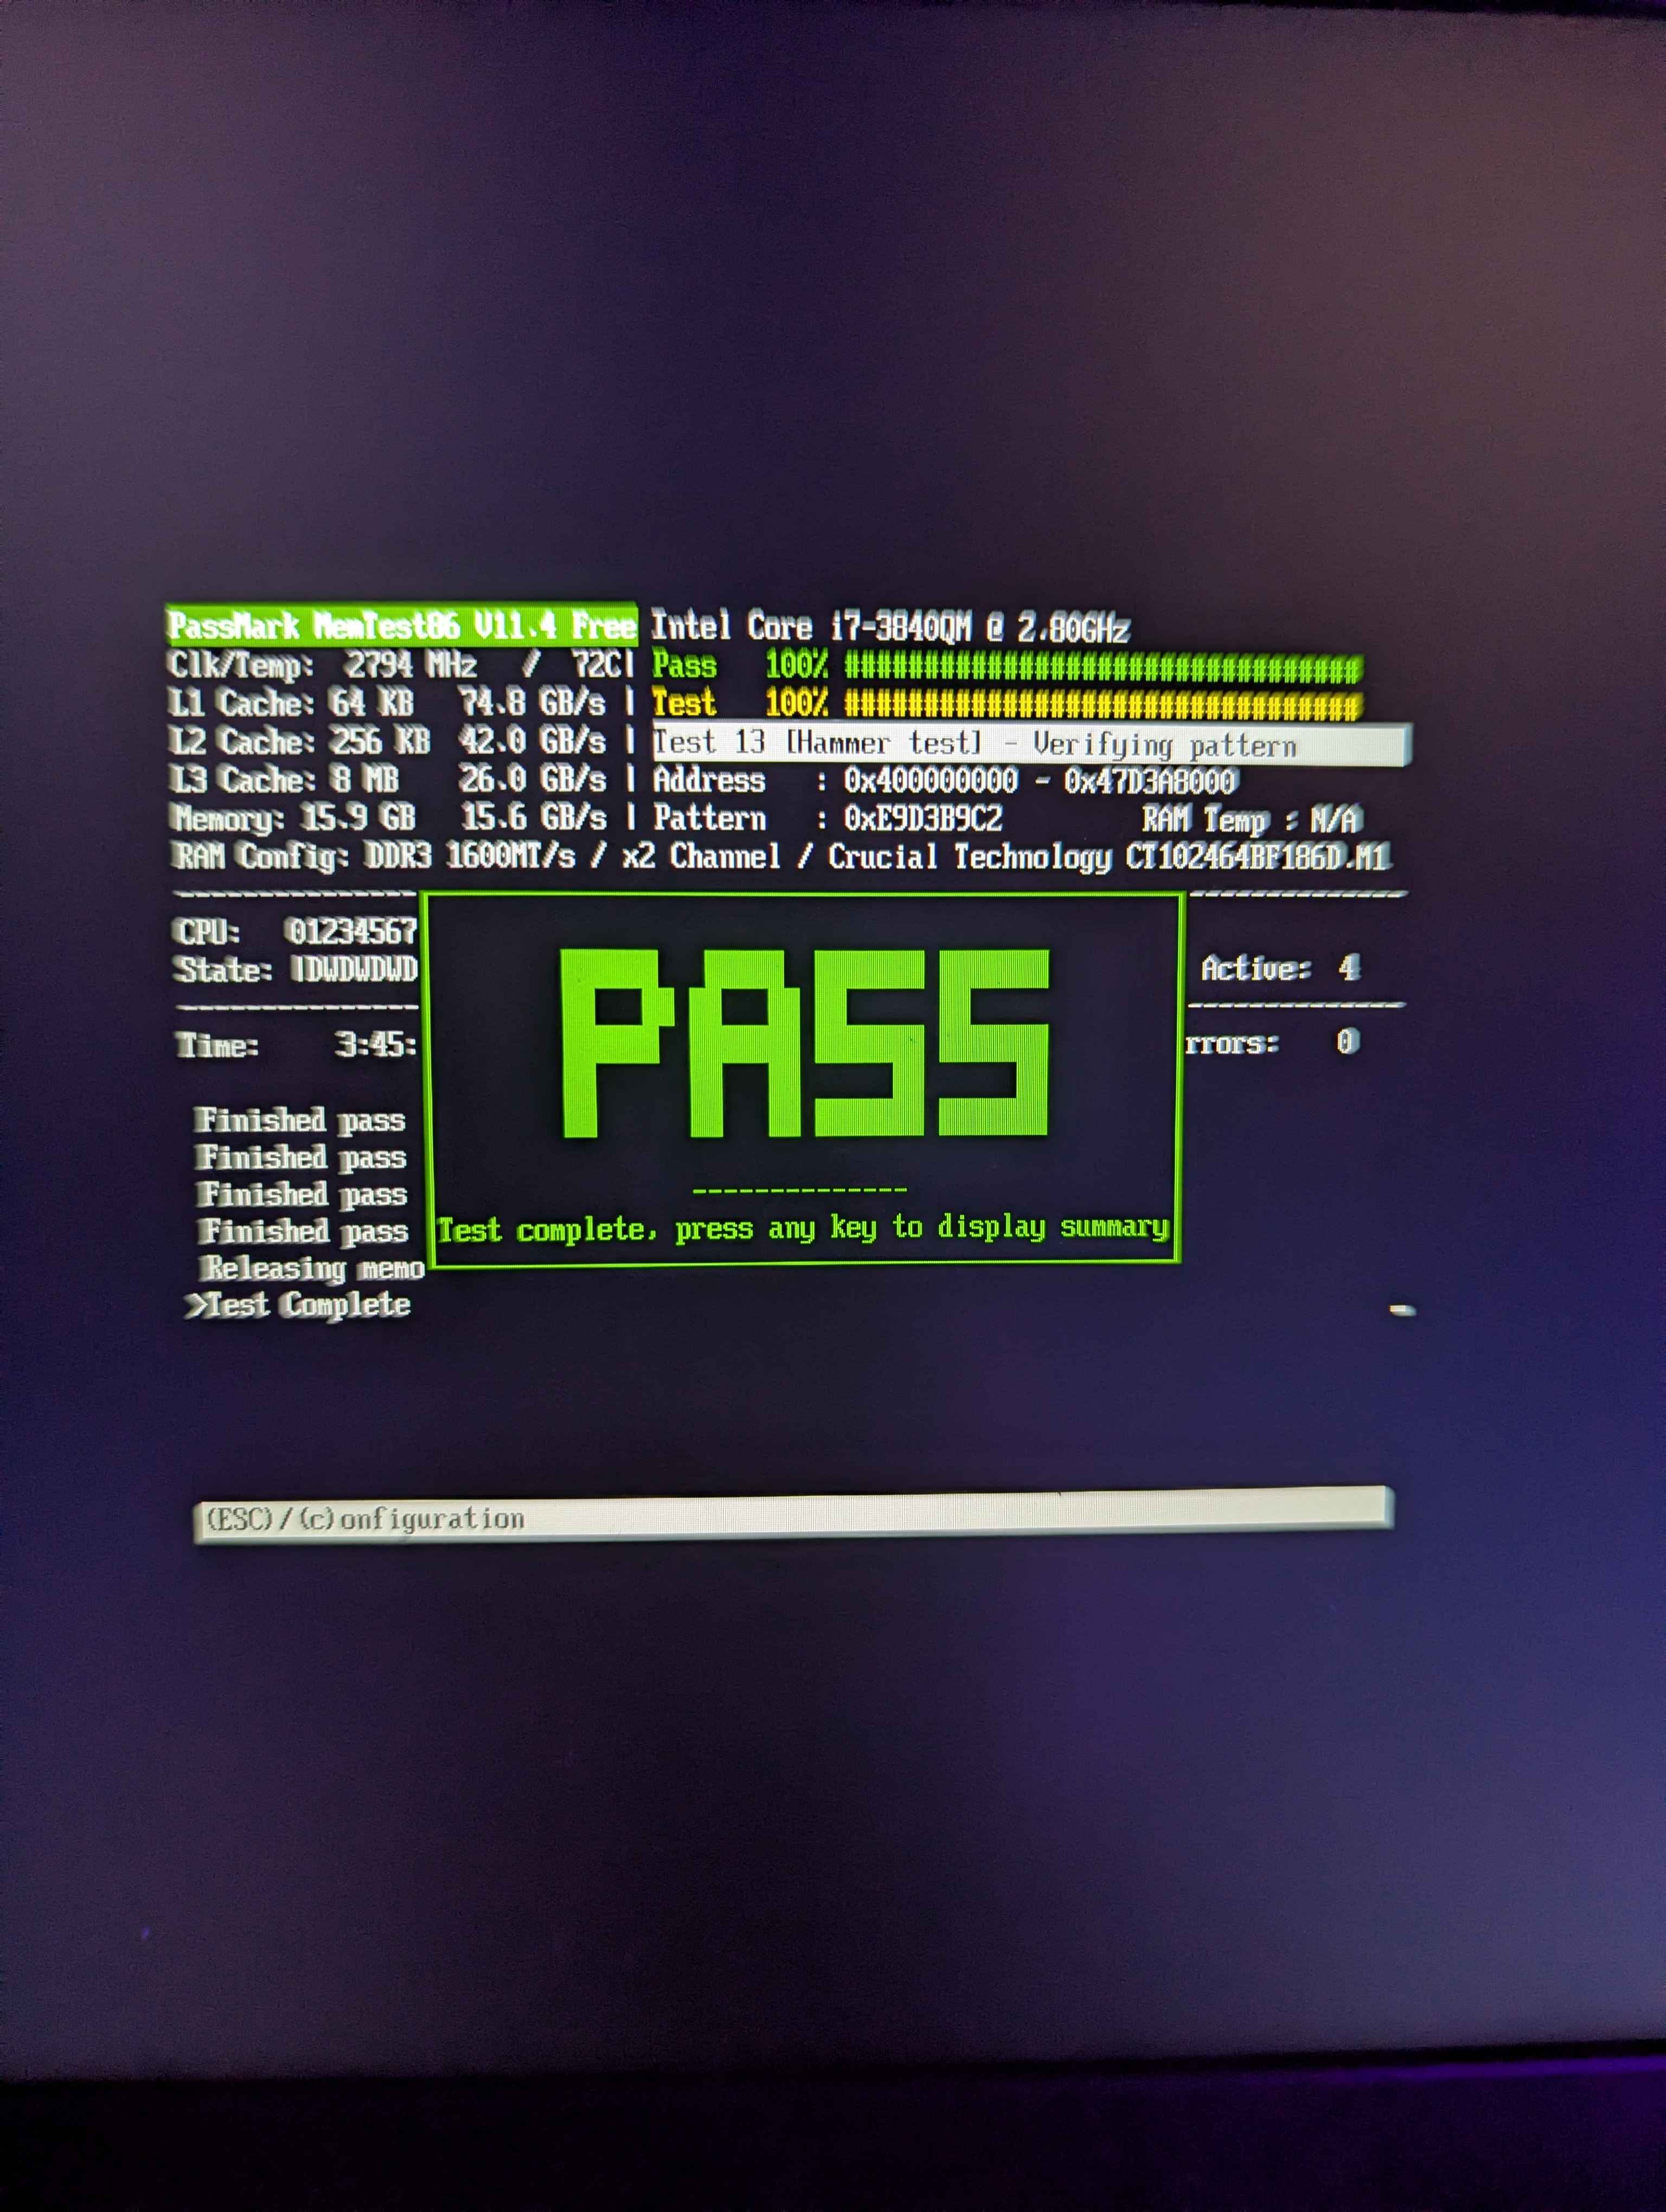
Long story short, just try to avoid DDR3L RAM if you can, instead try finding DDR3-1866 SODIMMs to put on your ThinkPad.
Upgrade 8: Wi-Fi card
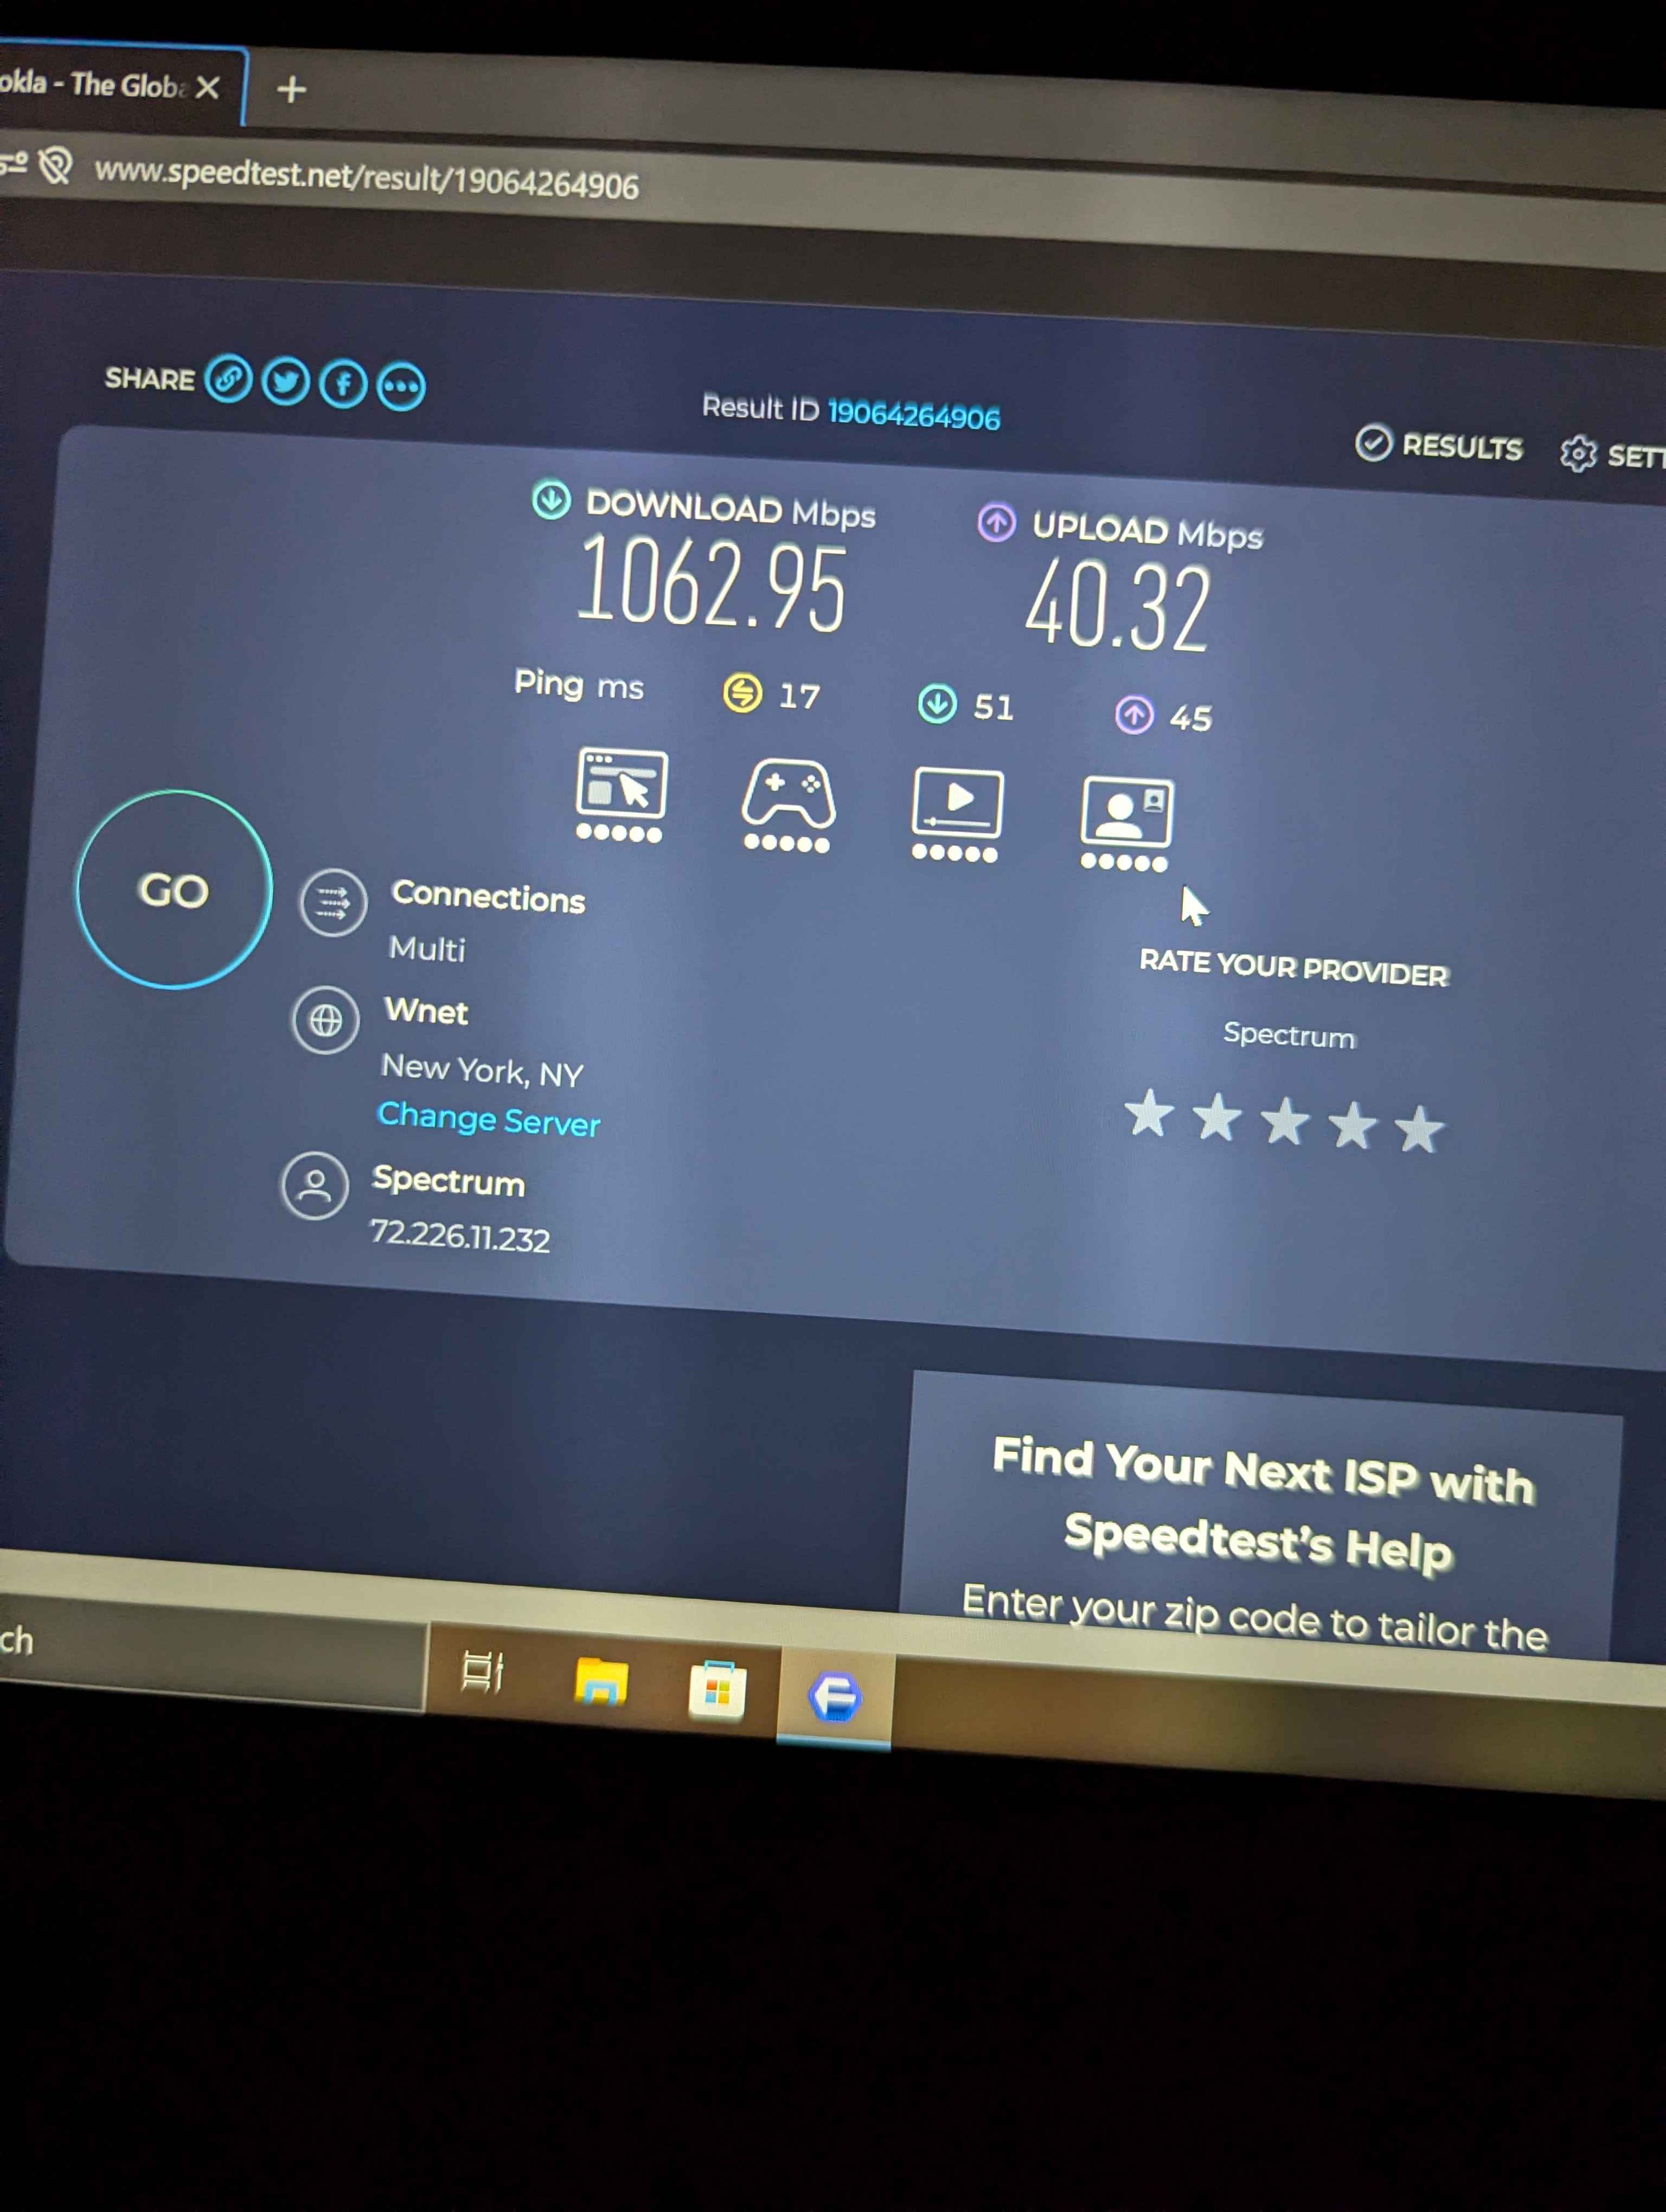
The internal Wi-Fi wasn’t great. I have a gigabit internet connection and a Wi-Fi 6E access point nearby, but I could only pull in a maximum 200 megabits per second.
Thankfully, with Coreboot installed, we can finally upgrade it to something better. I chose the MPE-AXE3000H as it supported Wi-Fi 6E and Bluetooth 5.2, which pairs well with my headphones. The installation was easy as I just needed to remove the keyboard and replace the Wi-Fi card, and put the antenna pins back together after the install.
After that, I was able to get the proper gigabit speeds as expected! If I had a weaker CPU, then I probably would’ve ended up with slower speeds, but the i7-3840QM handles it like a champ.
Upgrade(?) 9: Expresscard
I put a question mark because I wasn’t exactly sure what to do with the Expresscard slot on the side of the ThinkPad.
When I looked into Expresscard accessories, I was able to find stuff like an eGPU stand and an NVMe adapter, but both of these options are non-portable and take up extra space. There was a USB 3.0 card that added two USB slots, which seemed to be the most useful since the T420 only has USB 2.0 slots.
However, the USB Expresscards that are available out there seem to have a bunch of complaints. For one, they all use the same internal chip, which means that they will all perform the same and there isn’t an alternative that I can look at. They also have high temps and power usage, and I probably won’t be able to boot into an OS using this thing.
Since it was only $12, I decided to bite the bullet and get one.
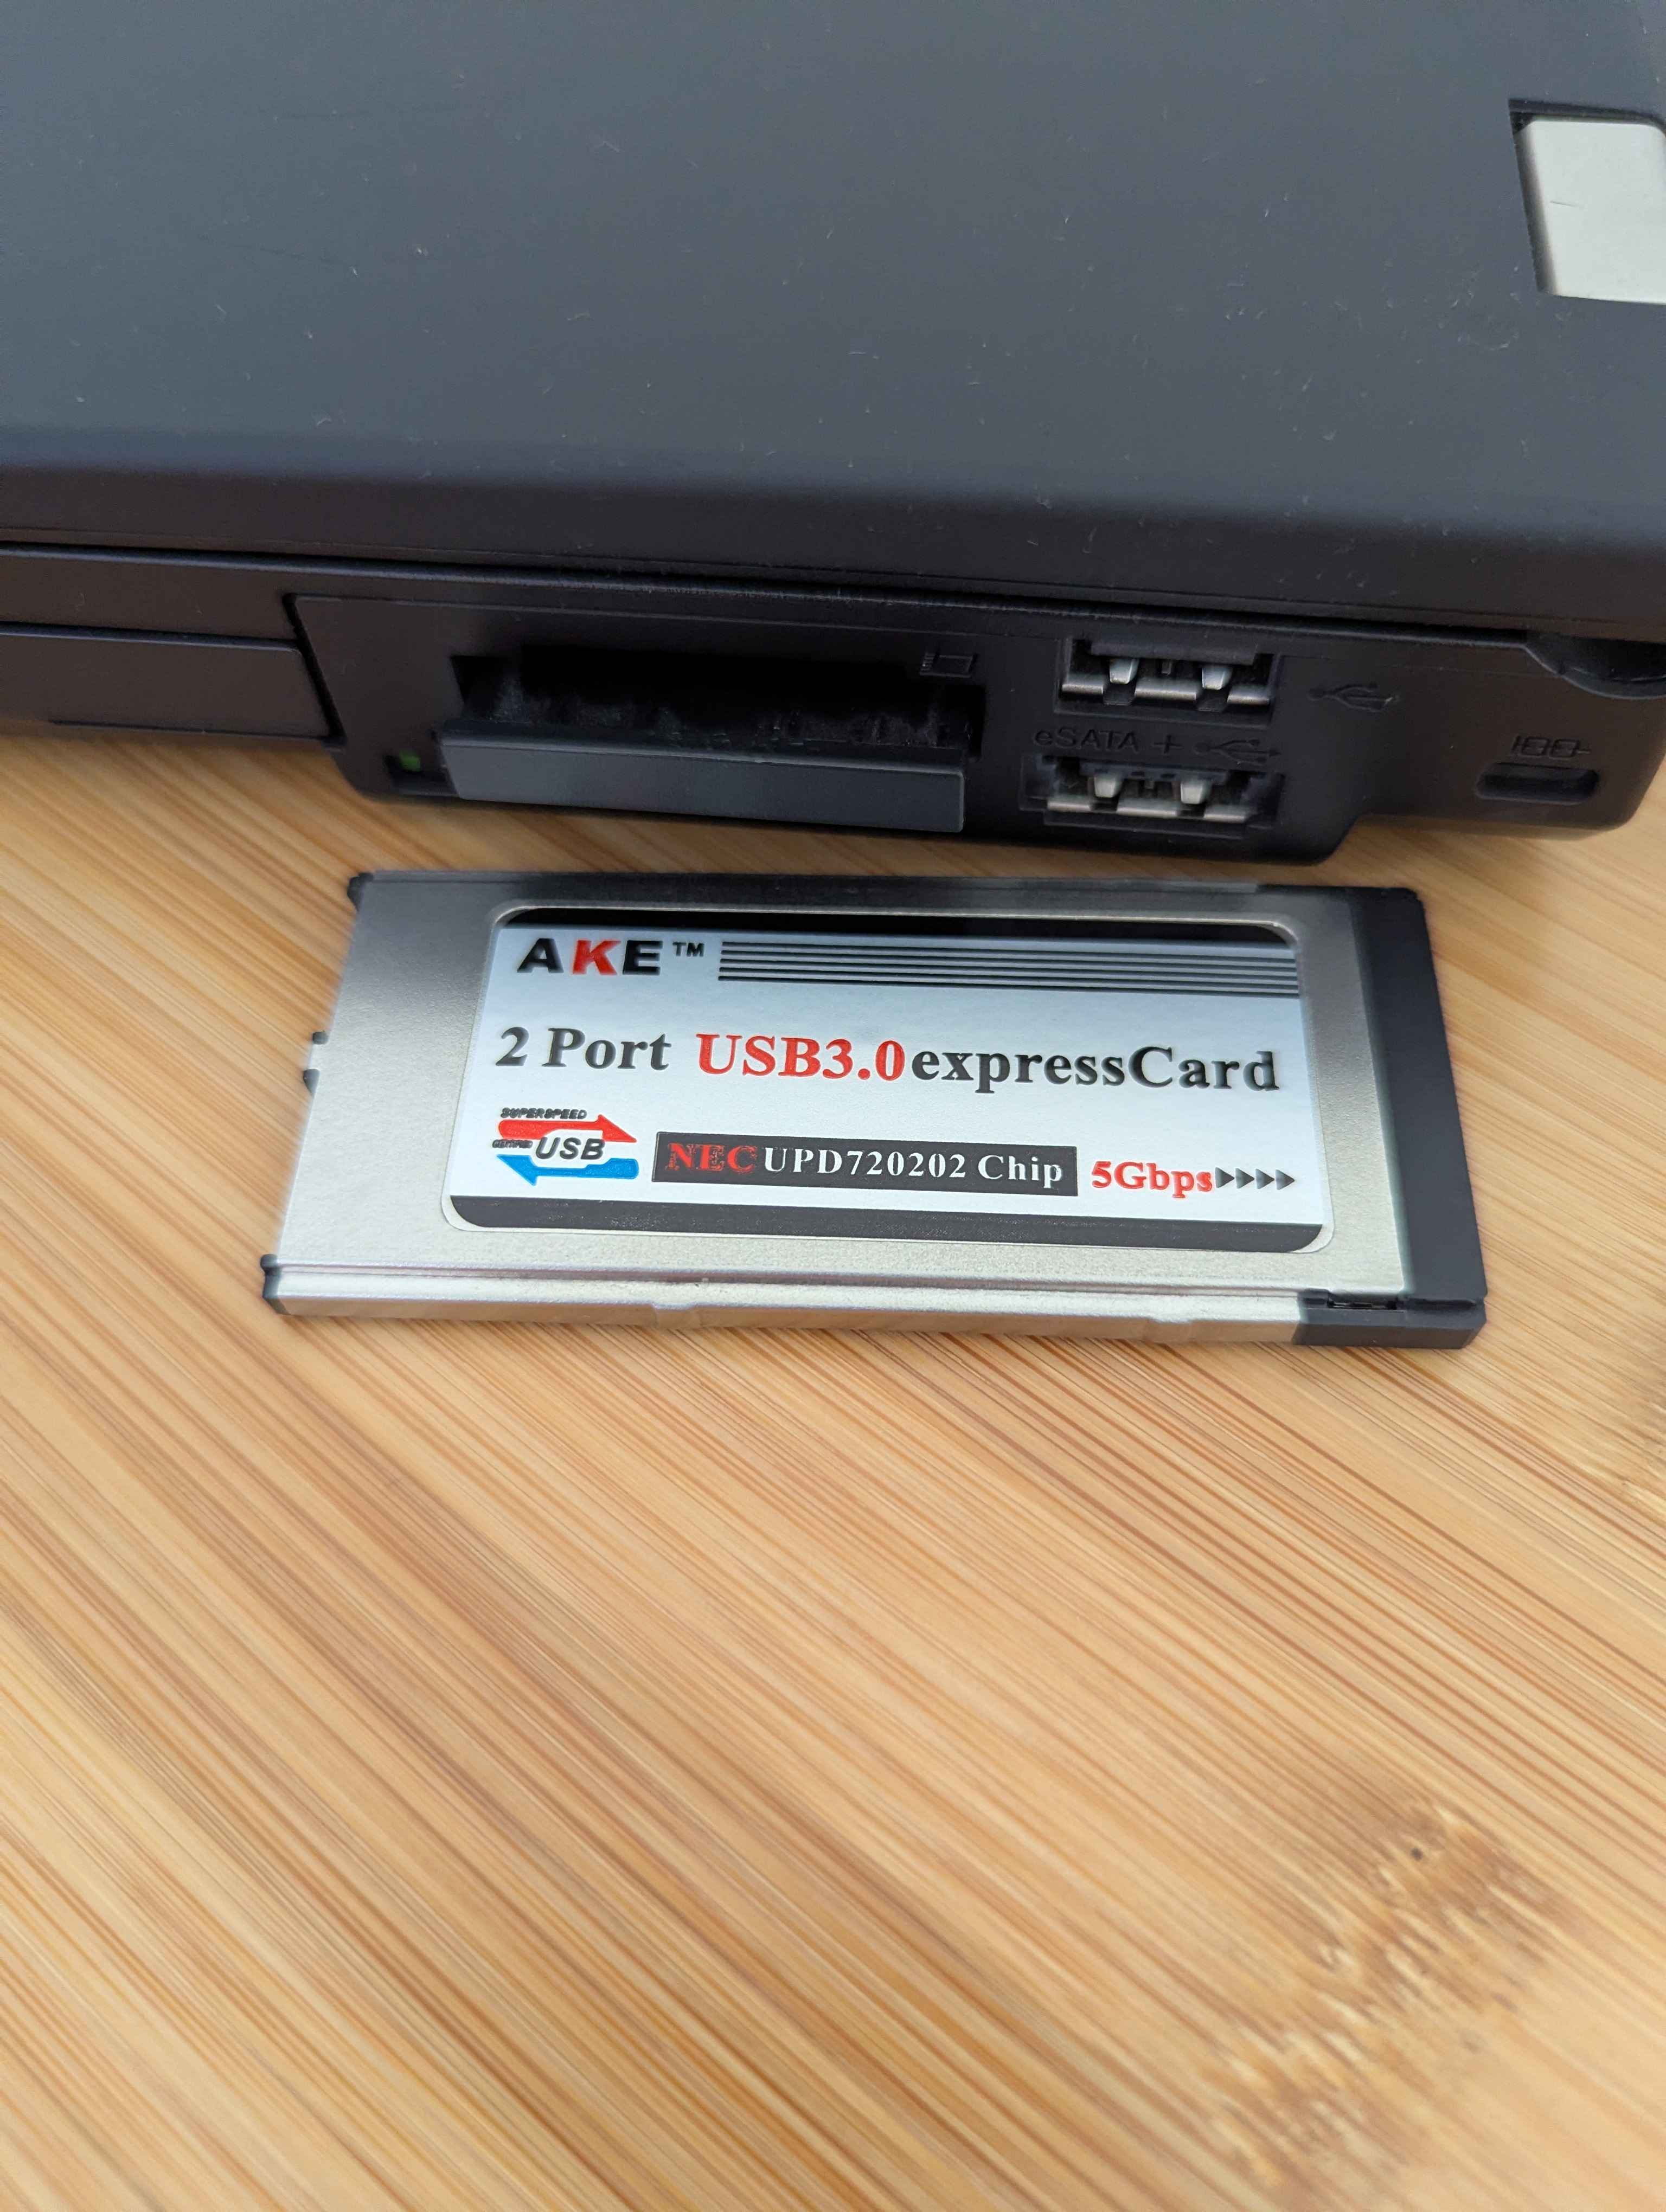
To install it, I pushed onto the empty Expresscard cover which caused it to pop open. That way I could just pop in the USB card. What I immediately liked was that the USB ports were flush to the laptop, so it doesn’t take extra space unlike the other Expresscard accessories. The only problem with this is that you might have issues fitting both USB devices at once.
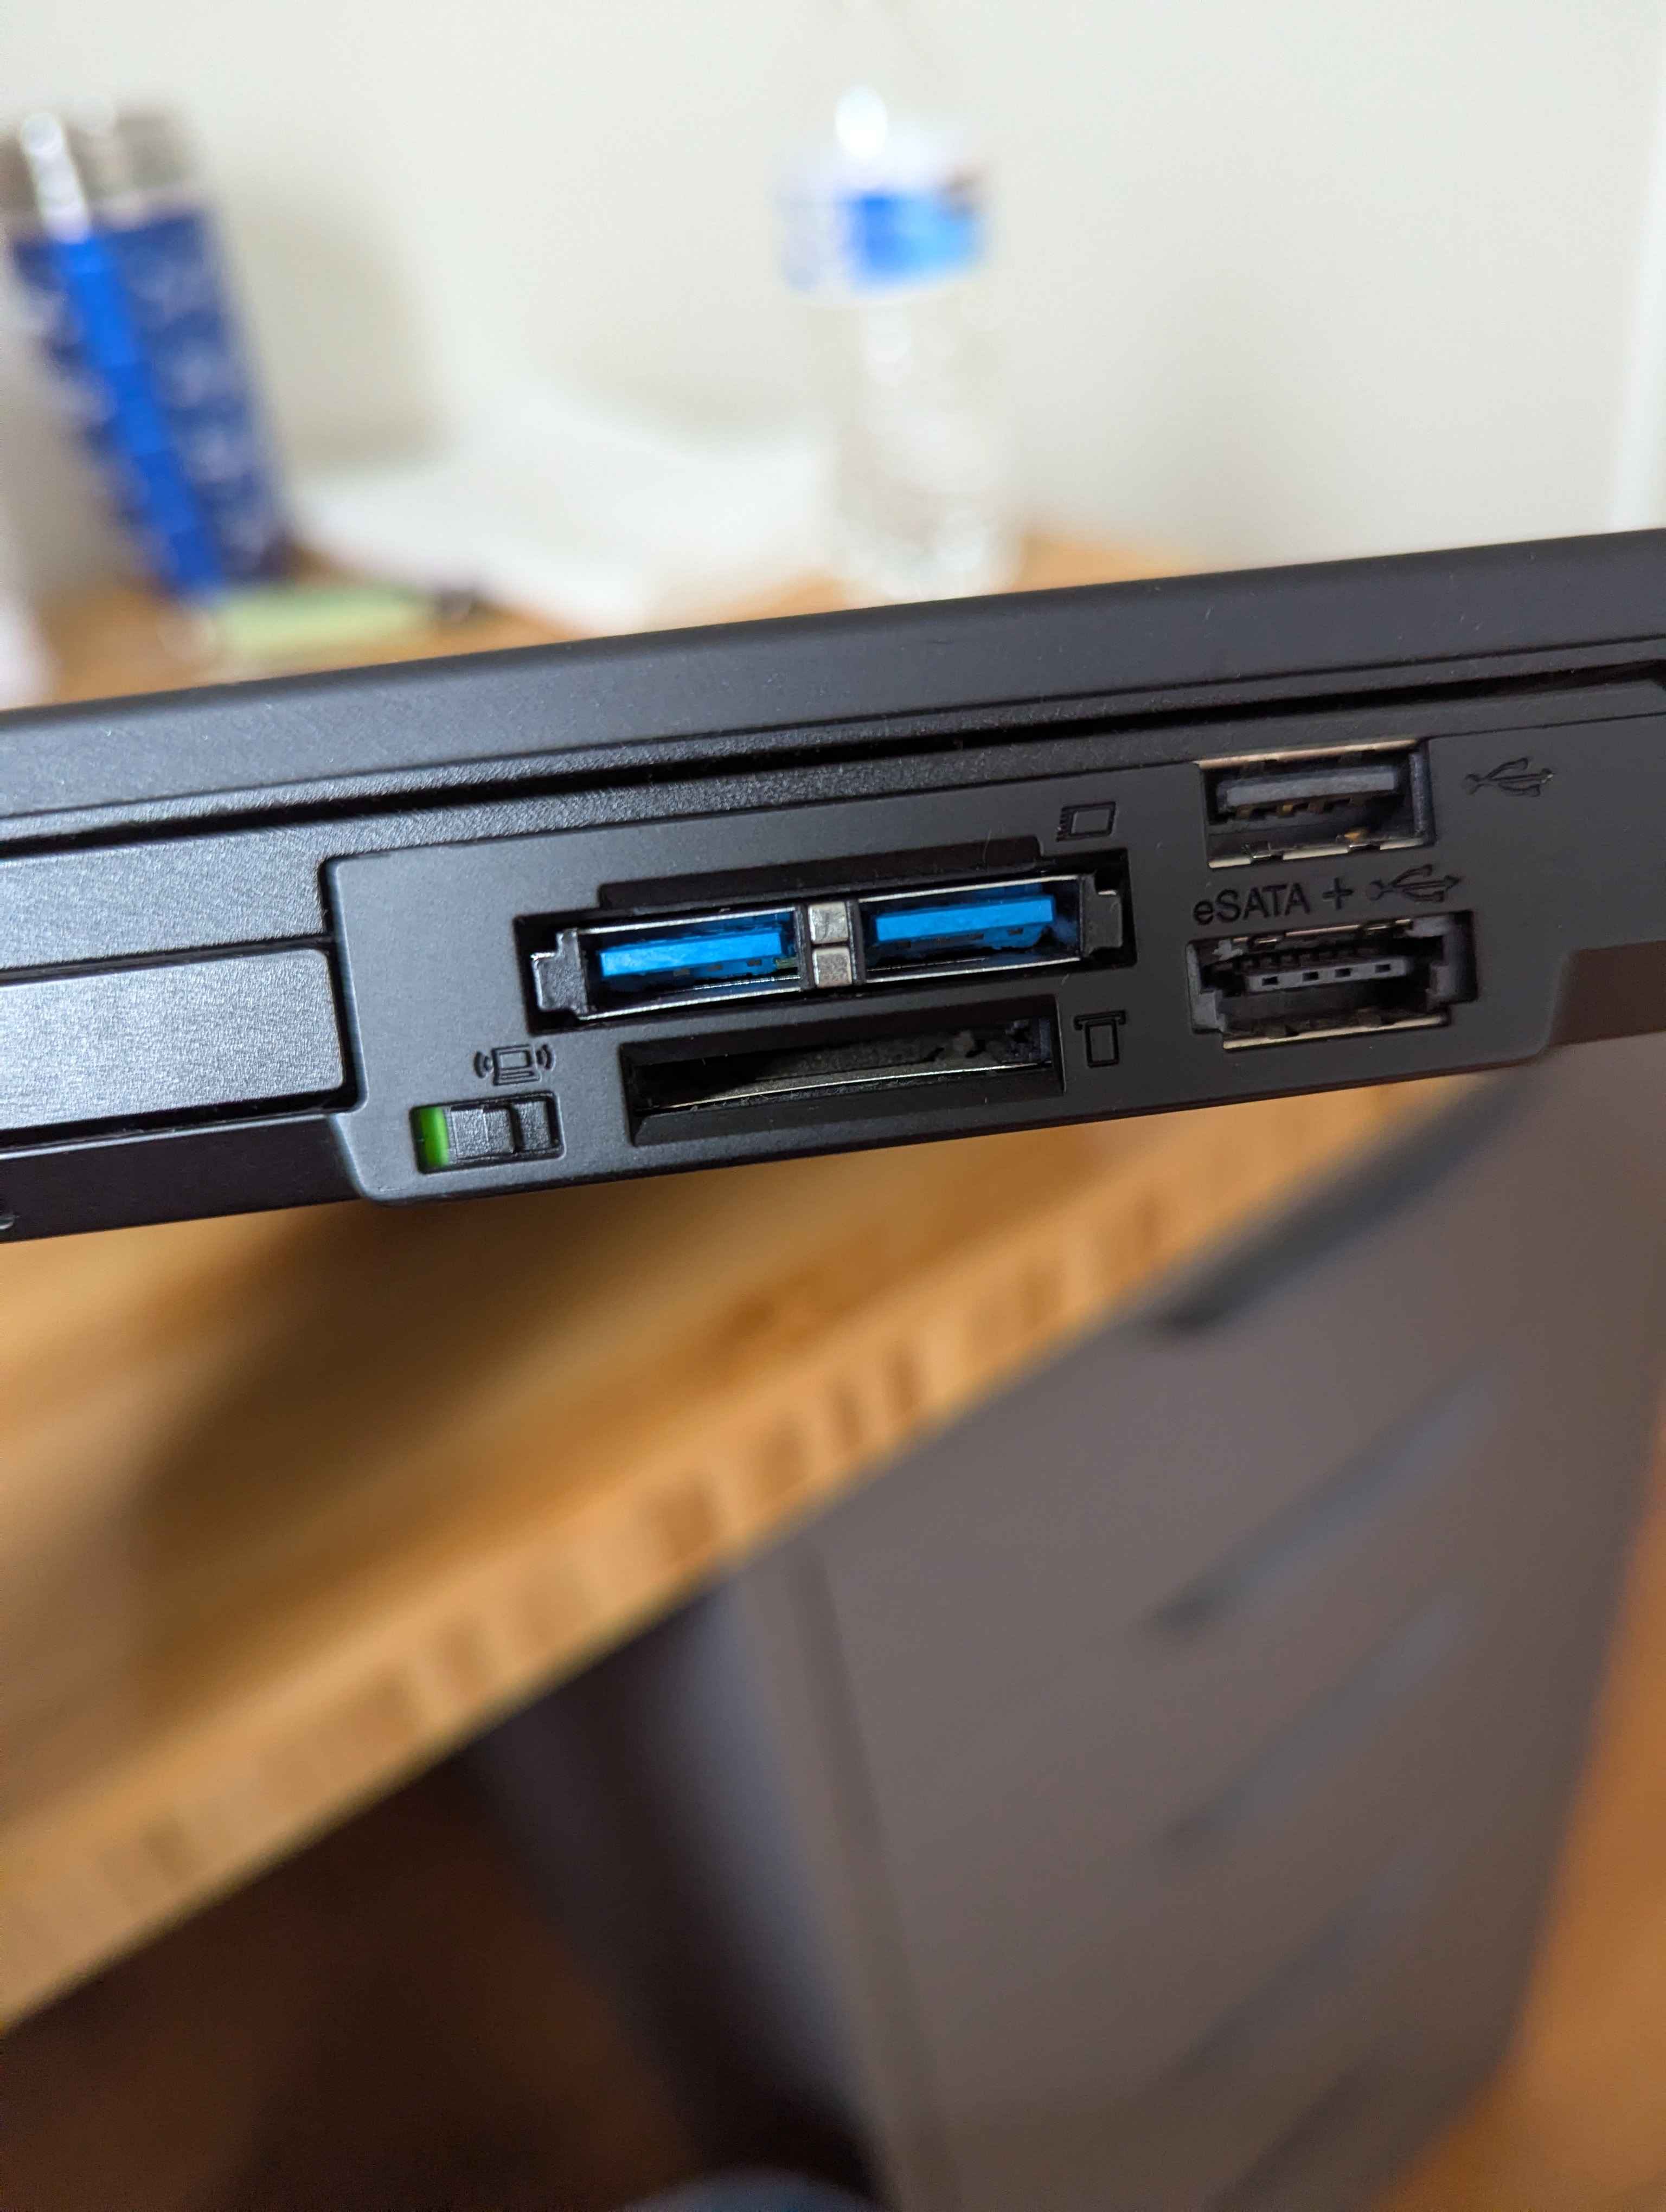
With Linux Mint it worked out of the box. I can’t attest to the transfer speed, but I was able to flash a Linux distro on it and it was pretty fast. I was even able to boot from it, so that’s one fear gone. It also worked on Windows but I needed to install a driver update first.
Like the complaints say, I did notice the heat issue with the USB card. It gets really hot even if I just have it on the ThinkPad without actually having any USB drives on. Also, I sometimes encountered an issue where the entire card gets unplugged when I try to unplug a USB. As such, I just prefer to keep the card off and put in the cover in most cases, and will only plug it in when I need the extra speed increase.
Upgrades Summary
| Upgrade | Cost |
|---|---|
| Lenovo ThinkPad T420 | $84 |
| ThinkPad 55+ 9-cell Battery | $25 |
| AUO B140HAN01.3 1080p IPS Screen | $63 |
| 1080p IPS FHD Upgrade Kit for ThinkPad T420 | $46 |
| ThinkPad T420 Keyboard | $33 |
| EEPROM BIOS USB Programmer CH341A | $14 |
| Breadboard Jumper Wires | $6 |
| Intel Core i7-3840QM Quad-Core Socket G2 laptop CPU | $54 |
| CPU Cooling Fan with Heatsink For ThinkPad T420i | $36 |
| 2” x 33FT Copper Foil Tape with Conductive Adhesive | $8 |
| 2x 10mmx33m Kapton Heat Tape | $5 |
| Crucial 2x8GB DDR3L-1866 SODIMM (CT102464BF186D.M16FN) | $41 |
| MPE-AXE3000H Mini PCIE Wi-Fi 6E Bluetooth 5.2 Network Card | $21 |
| Total | $436 |
In total I spent around $436 on a ThinkPad and kitting it out for full performance. This doesn’t include miscellaneous stuff like the cleaning equipment, thermal paste, and the 2.5 inch SATA SSD. Otherwise, I consider this a price ceiling for all the listed parts, and you’ll likely end up spending less than I have. This is because I think I overspent in favor of accessibility and shipping speed (all of my parts were from eBay and Amazon, when I could’ve gone elsewhere for better prices).
Final thoughts
The ThinkPad T420 is one of the most interesting tech devices I have ever owned. It’s my first introduction to the ThinkPad world, and I fully understand the hype around it. I really love how almost every part of this laptop feels modular - you can take apart the entire thing and take out almost every part and upgrade or replace them, which is part of the reason why I wanted to buy one and upgrade it as much as I can. I also liked the special gimmicky features of the ThinkPad, such as the hotswappable CD-ROM drive and the ThinkLamp, which is a small light lamp near the camera that lights up the entire keyboard area. In my opinion, a feature like the ThinkLamp feels super unique and more preferable than a simple backlit keyboard.
But would I use this as my main laptop for all my computing needs? Honestly, probably not. The biggest factor that sways me away from daily driving this ThinkPad is the sheer size and weight of it. The T420 is big and heavy, which on one hand I really like, since it makes the ThinkPad feel like it’s built like a tank and that it can handle physical stress or damage much better than other laptops, but on the other hand it makes it difficult to carry around with my backpack and use it in public. Other than that, I also feel like the processing power of this laptop is not quite enough for what I do every day. My upgraded T420 handles web browsing, playing videos, and typing super well, and it can handle some light coding well (though it can lag when using an IDE like VSCode), but it struggles at anything that needs a lot of CPU and RAM power, like video games, recording, and attending large group calls on Zoom or Discord.
Either way, this doesn’t change how I feel about my ThinkPad T420 and ThinkPads in general. I could’ve easily started this journey with a newer ThinkPad model, but I feel like that would’ve made my upgrade journey shorter and more boring. I enjoyed every minute of tinkering, assembling, and almost breaking my ThinkPad, and doing it all with a physical piece of hardware that I actually own. That feeling can’t be easily replicated with devices that are constantly getting smaller and harder to take apart or upgrade, and it definitely can’t happen with computers that we don’t have physical access or ownership of. That’s probably the most important part of the whole journey.
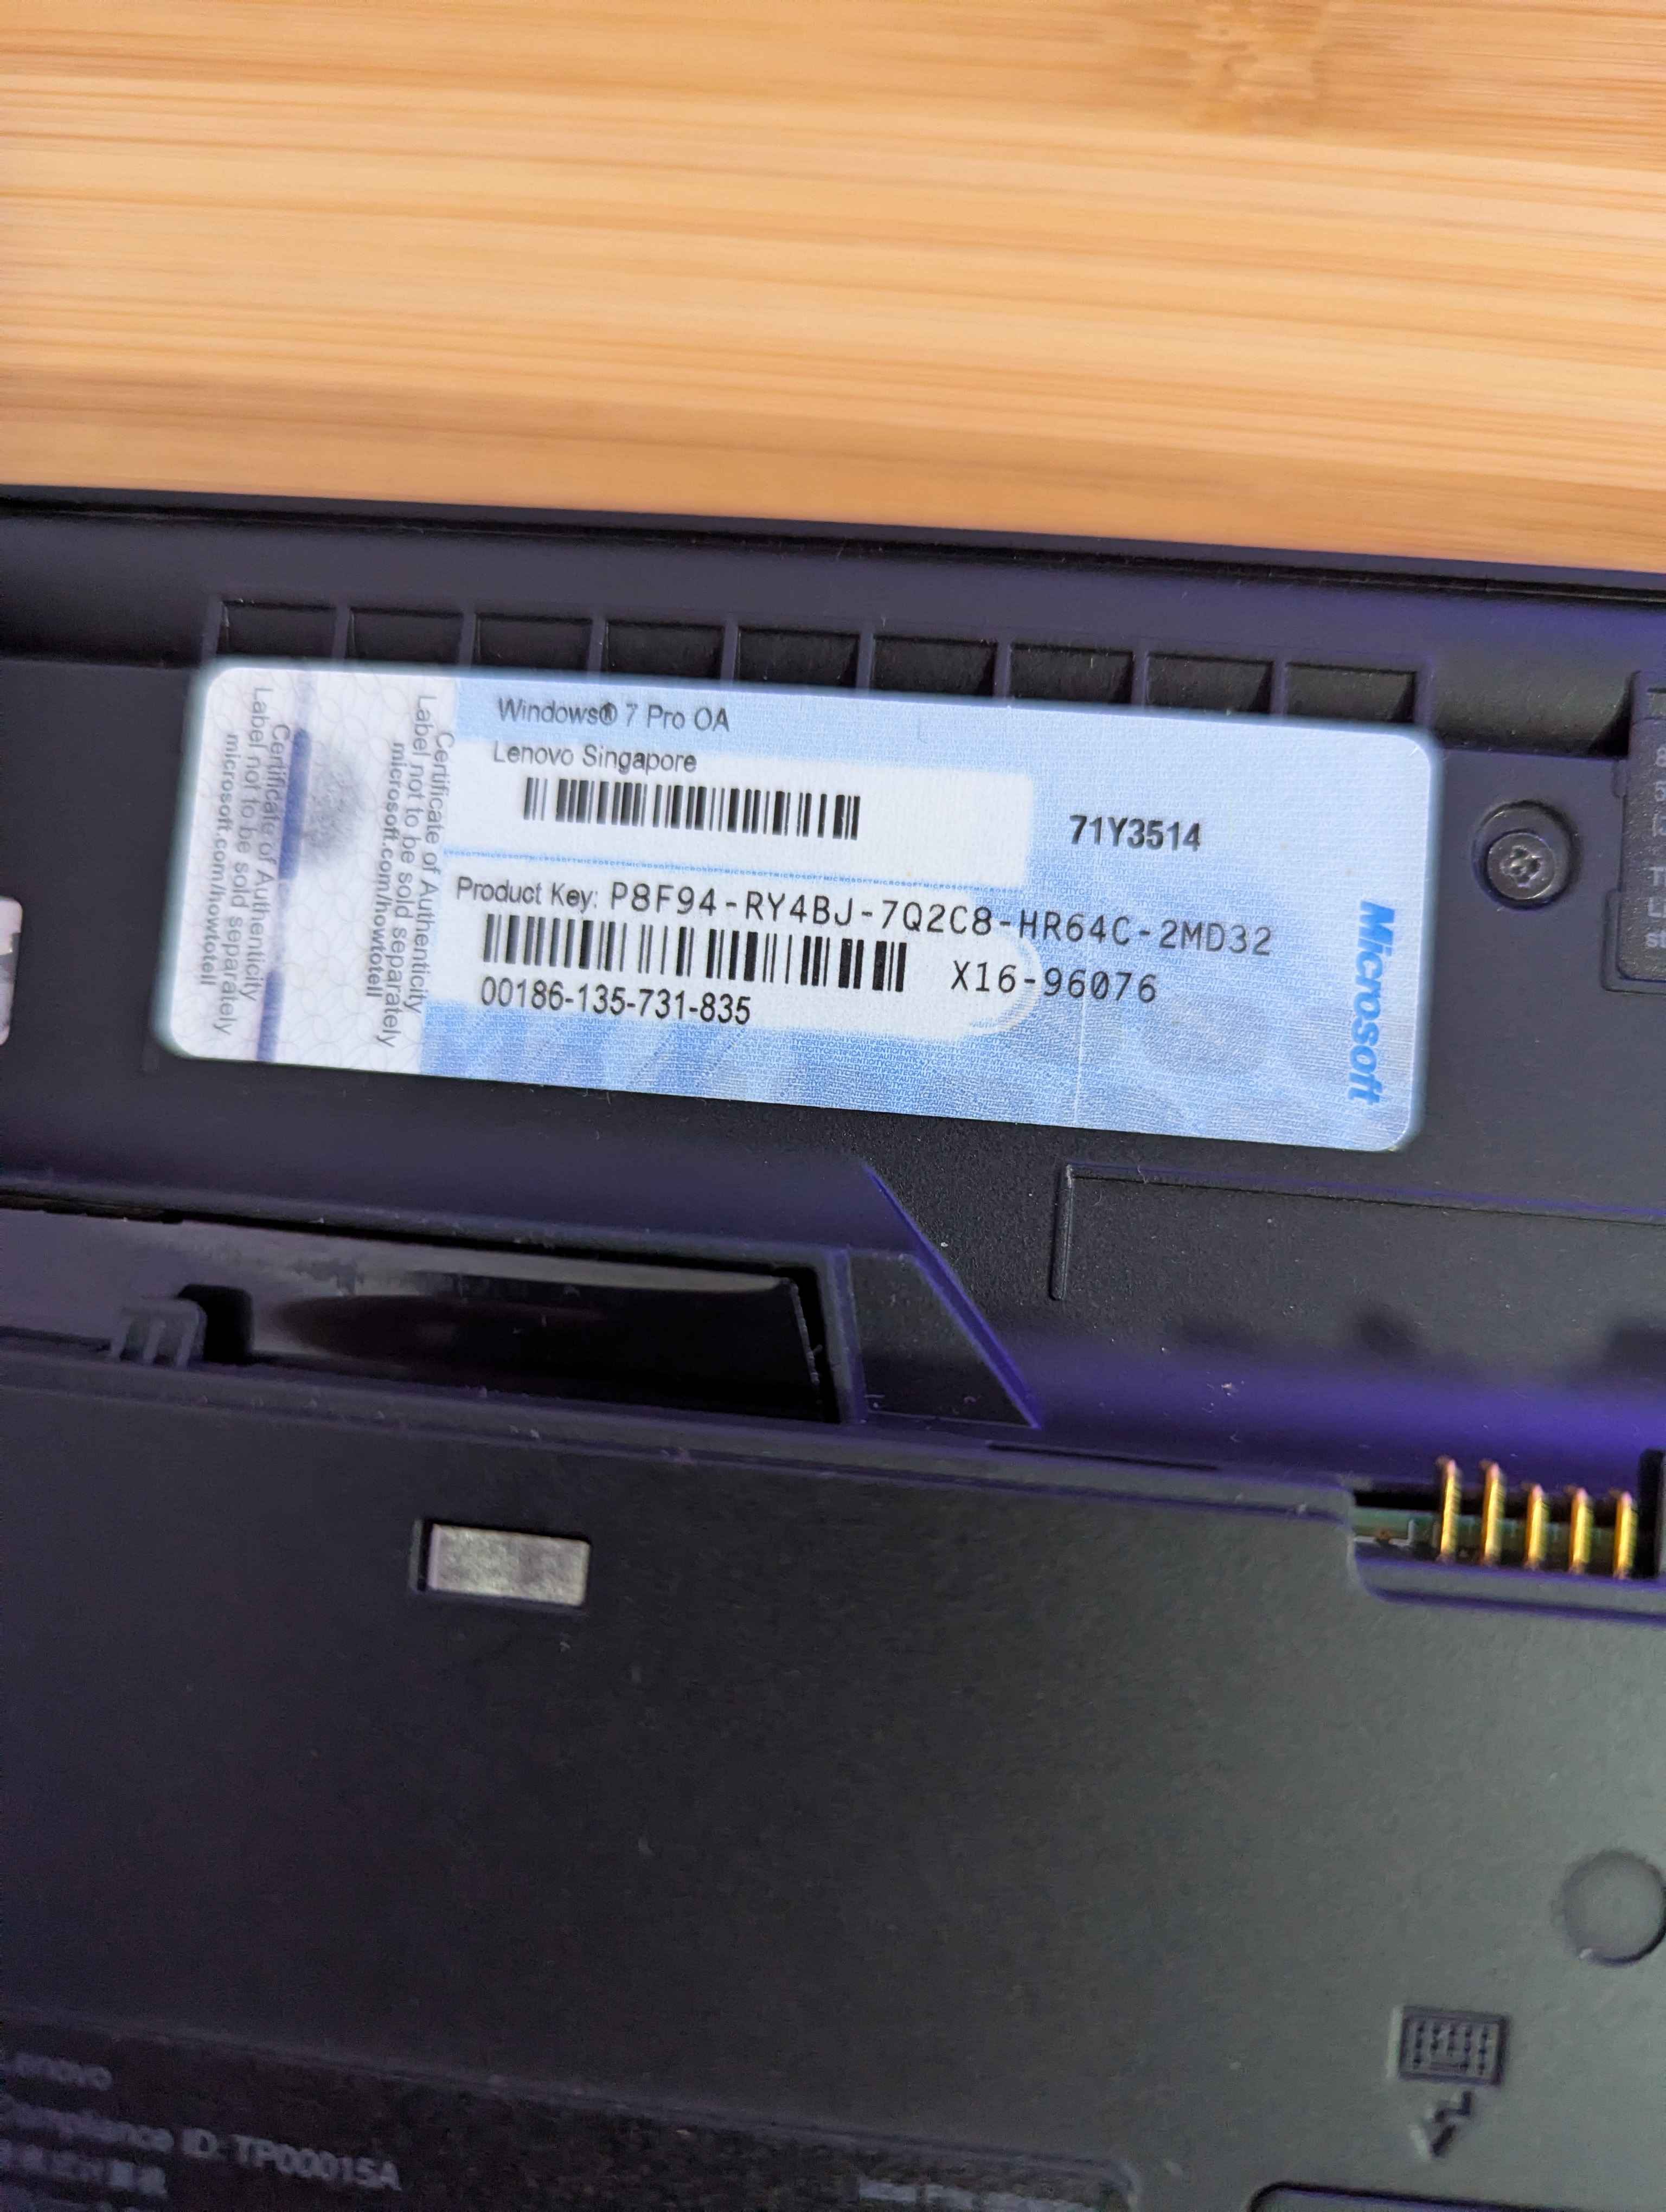
Thank you for reading this long post, and I hope that it helped you with your own ThinkPad journey, or at least found it informative. Since you made it this far, you can have this Windows 7 product key that I found hidden under the battery.